
NFS has long been a popular choice for storage for an Oracle database. The protocol is mature, robust and usually simple to consume. Oracle has embraced the standard with the dNFS extensions and support for RAC clustering. Furthermore, with the changes occuring in the Hypervisor market and the withdrawl of support for solutions like VVOLs, NFS provides a consistent vendor-neutral solution that spans hypervisors and bare metal systems.
The Everpure Flash Array has native support for NFS, along with SMB. Everpure states that Flash Array File is a “co-equal” first-class citizen with block on the Flash Array, meaning that NFS and SMB are baked into Purity//FA and not an add-on.
Like block, NFS and SMB file systems benefit from array-wide compression and deduplication, as well as Safe Mode ransomware protection. File systems can be also be replicated from one Flash Array to another, and there is now Active Cluster for File meaning that a file system can be made highly available even if a Flash Array fails, by providing access to the file system from more than one Flash Array.
In this blog post I am going to walk through creating an NFS file system on a Flash Array. These are mostly my lab notes to myself, but will also provide the foundation for a few future posts where I delve deeper into Oracle on NFS. Note that this process and these screen shots were taken on Purity 6.10.6. Releases of Purity that are older or newer may exhibit different functionality.
To create a new NFS file system, we must first create a new Purity file system. In the Purity interface navigate to the File Systems tab and then select the + button which is located on the right hand side next to the 3-dots.
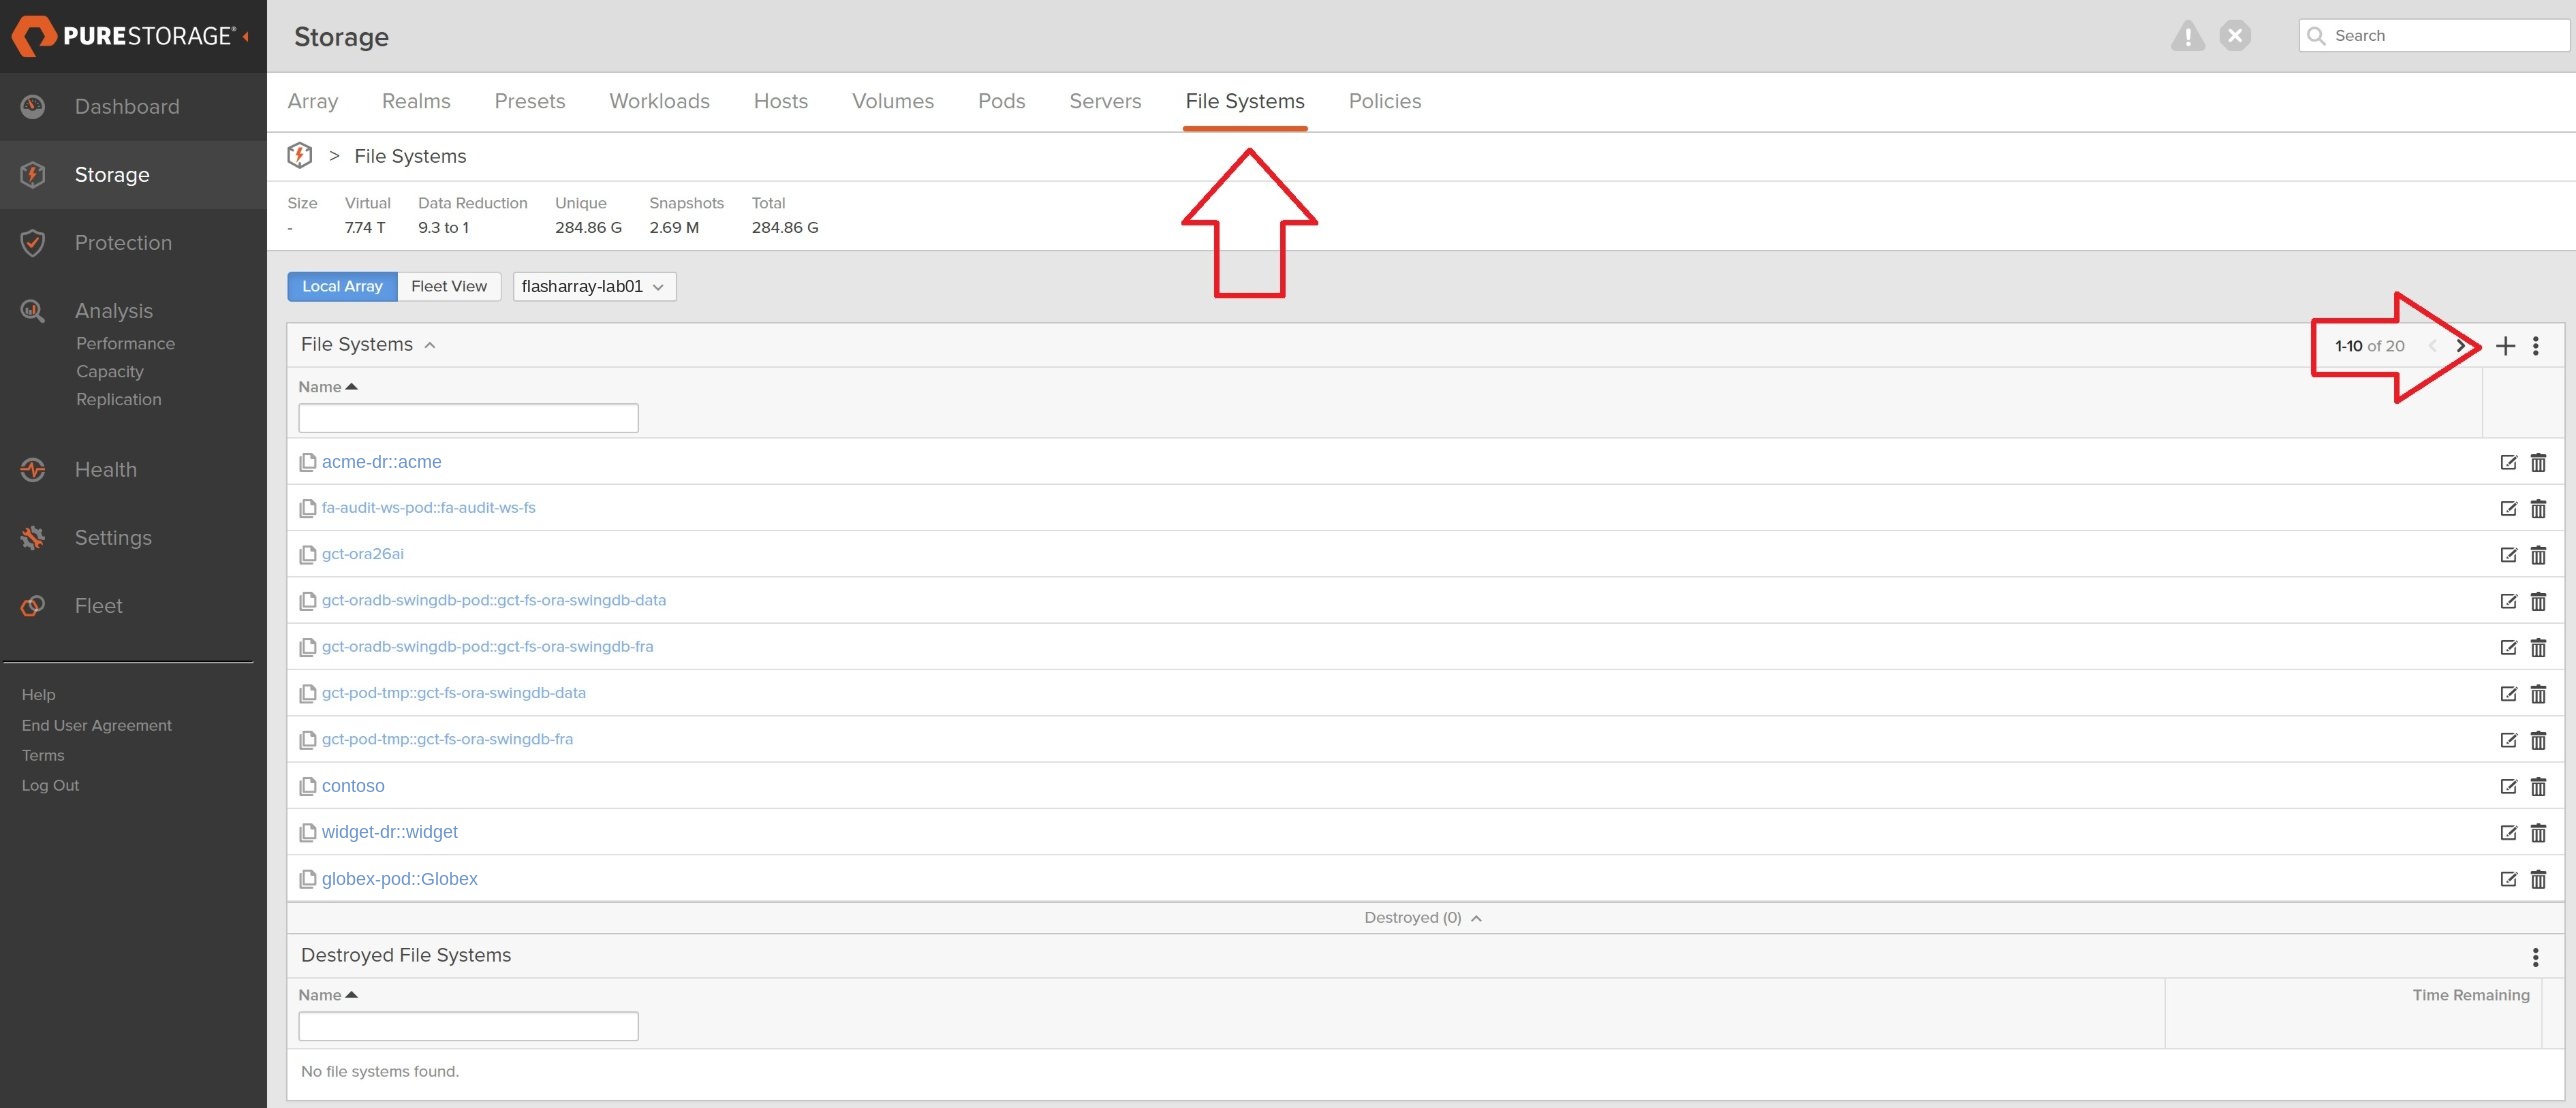
Give the new file system a unique and descriptive name.
Next we need to add a new policy. A policy can be shared amongst multiple NFS exports, so if you already have one then by all means reuse it here. But I am assuming this if the first NFS export, so in my example I will create a new policy.
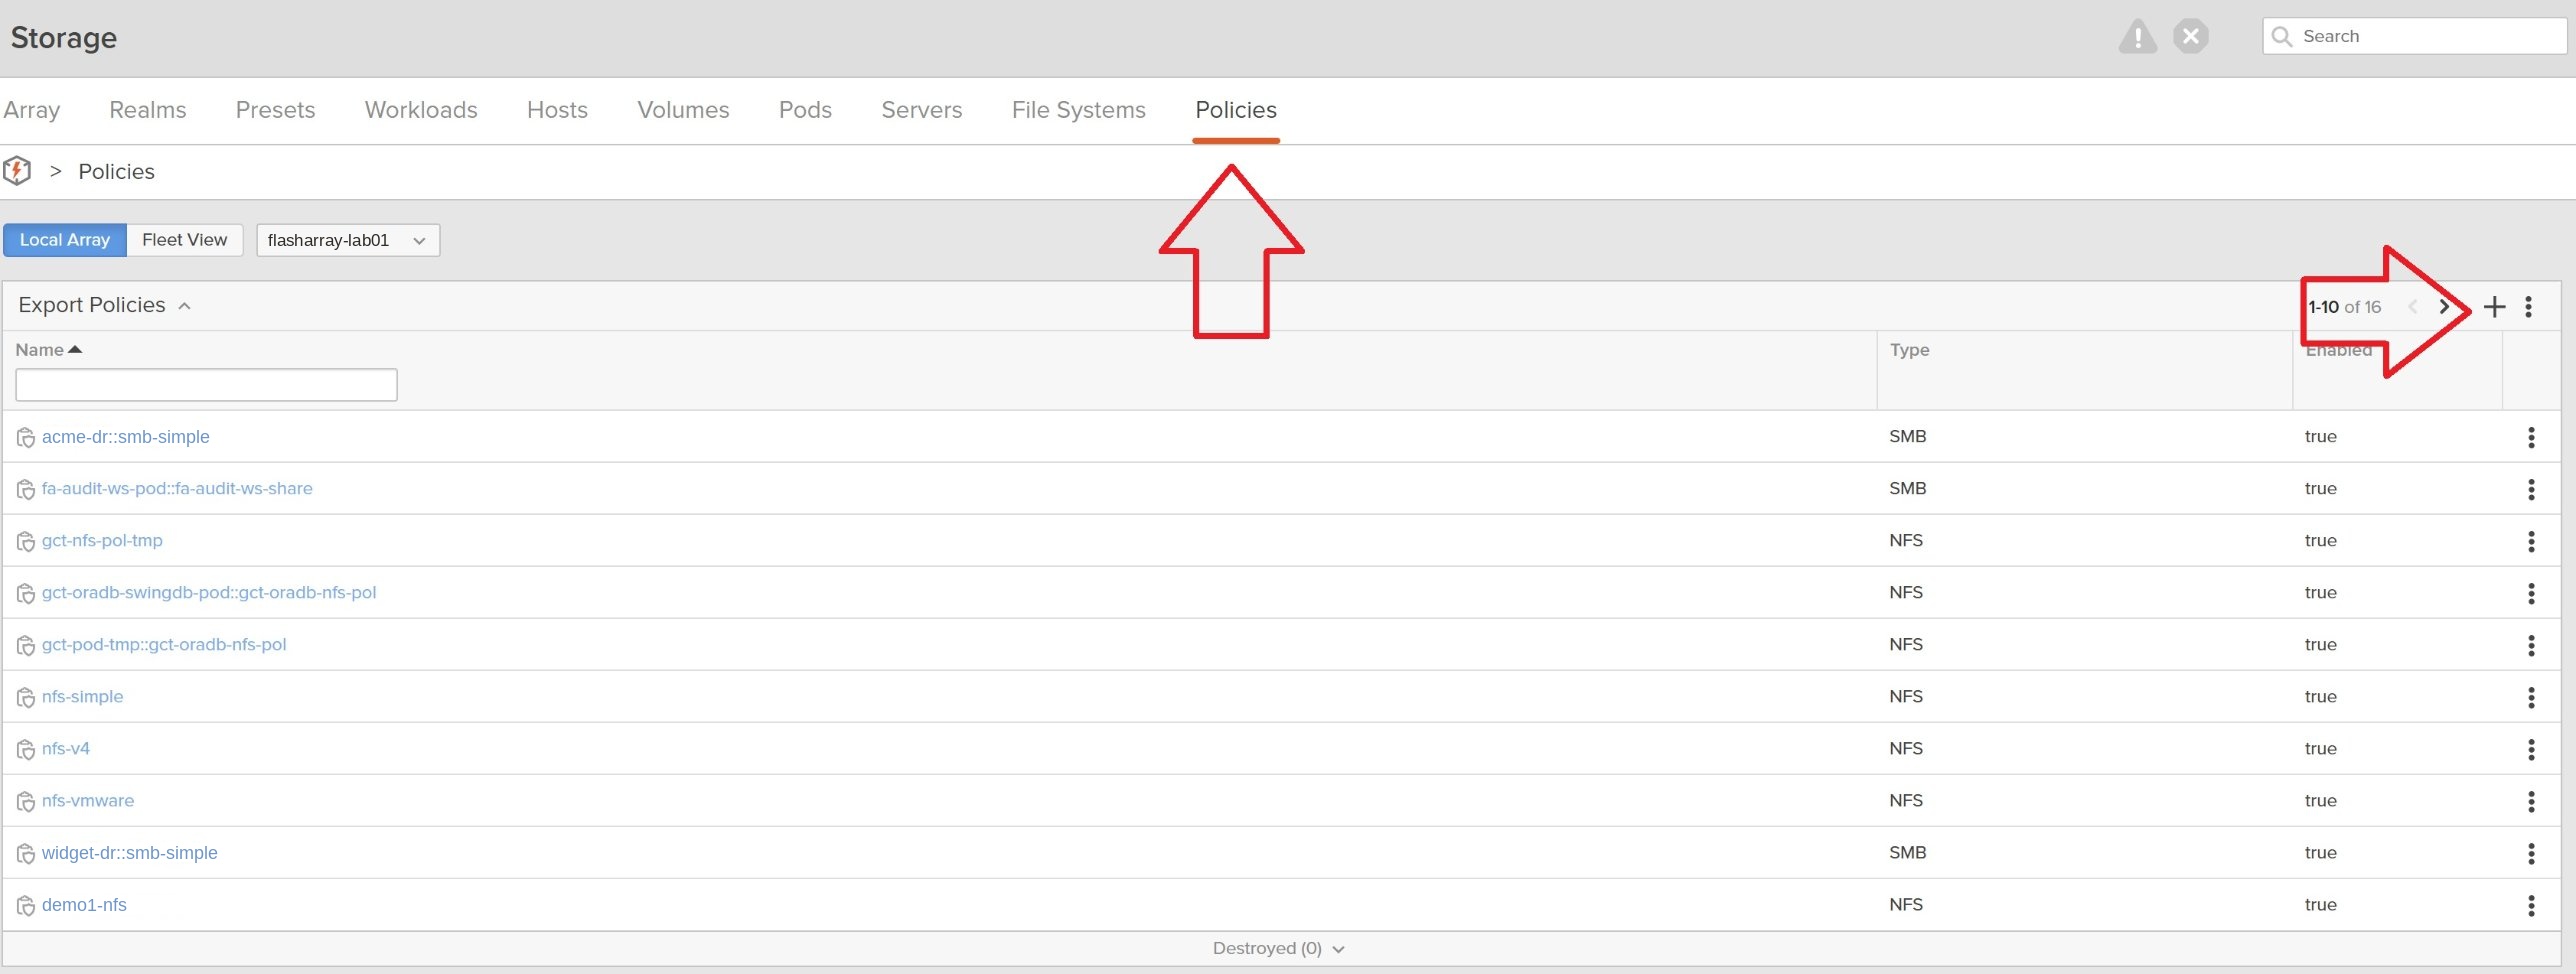
Navigate to the Policies tab in Purity and select the + button, which is located on the right hand side of the screen next to the 3-dots.
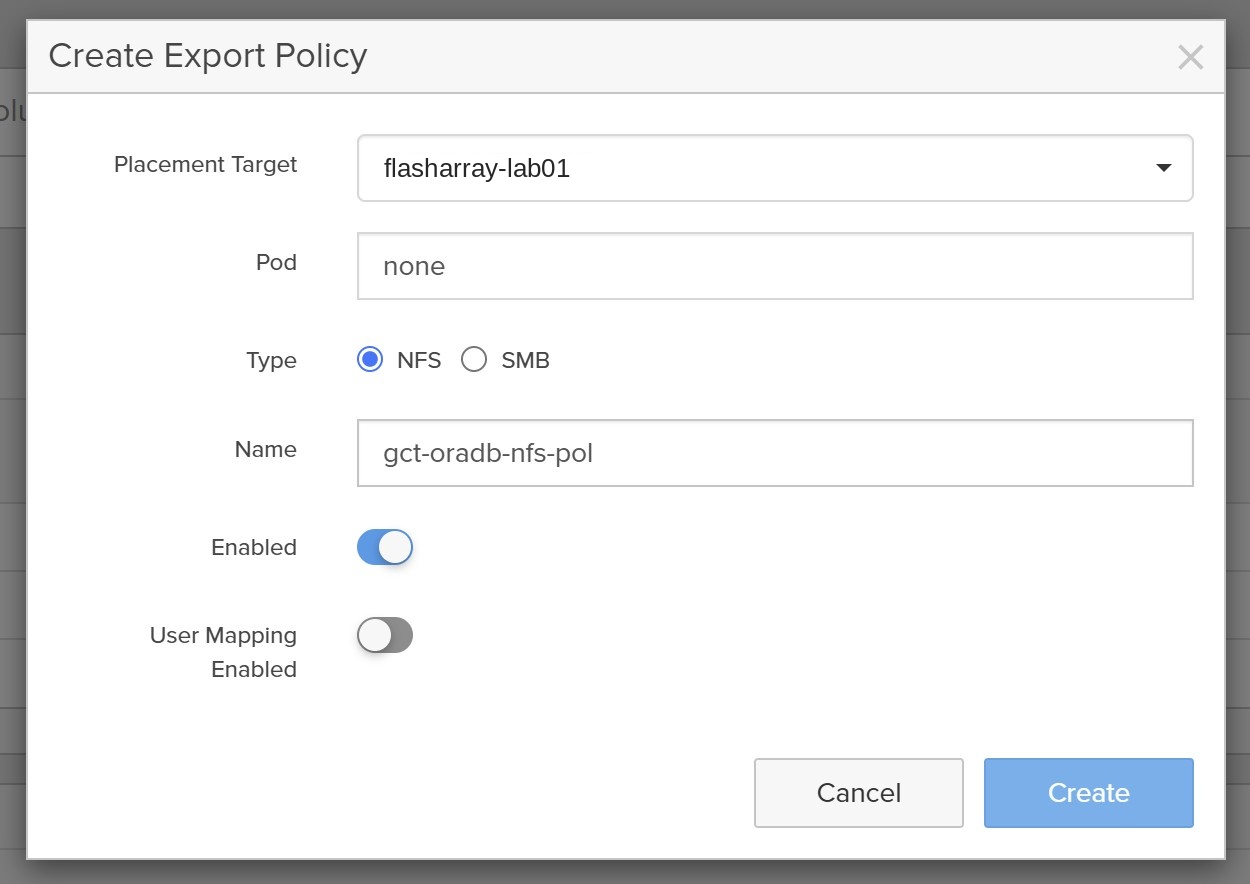
In the Create Export Polic screen, select the policy type to NFS and set it to Enabled. Set the User Mapping Enabled slider to off. At this point we are leaving the Pod blank.
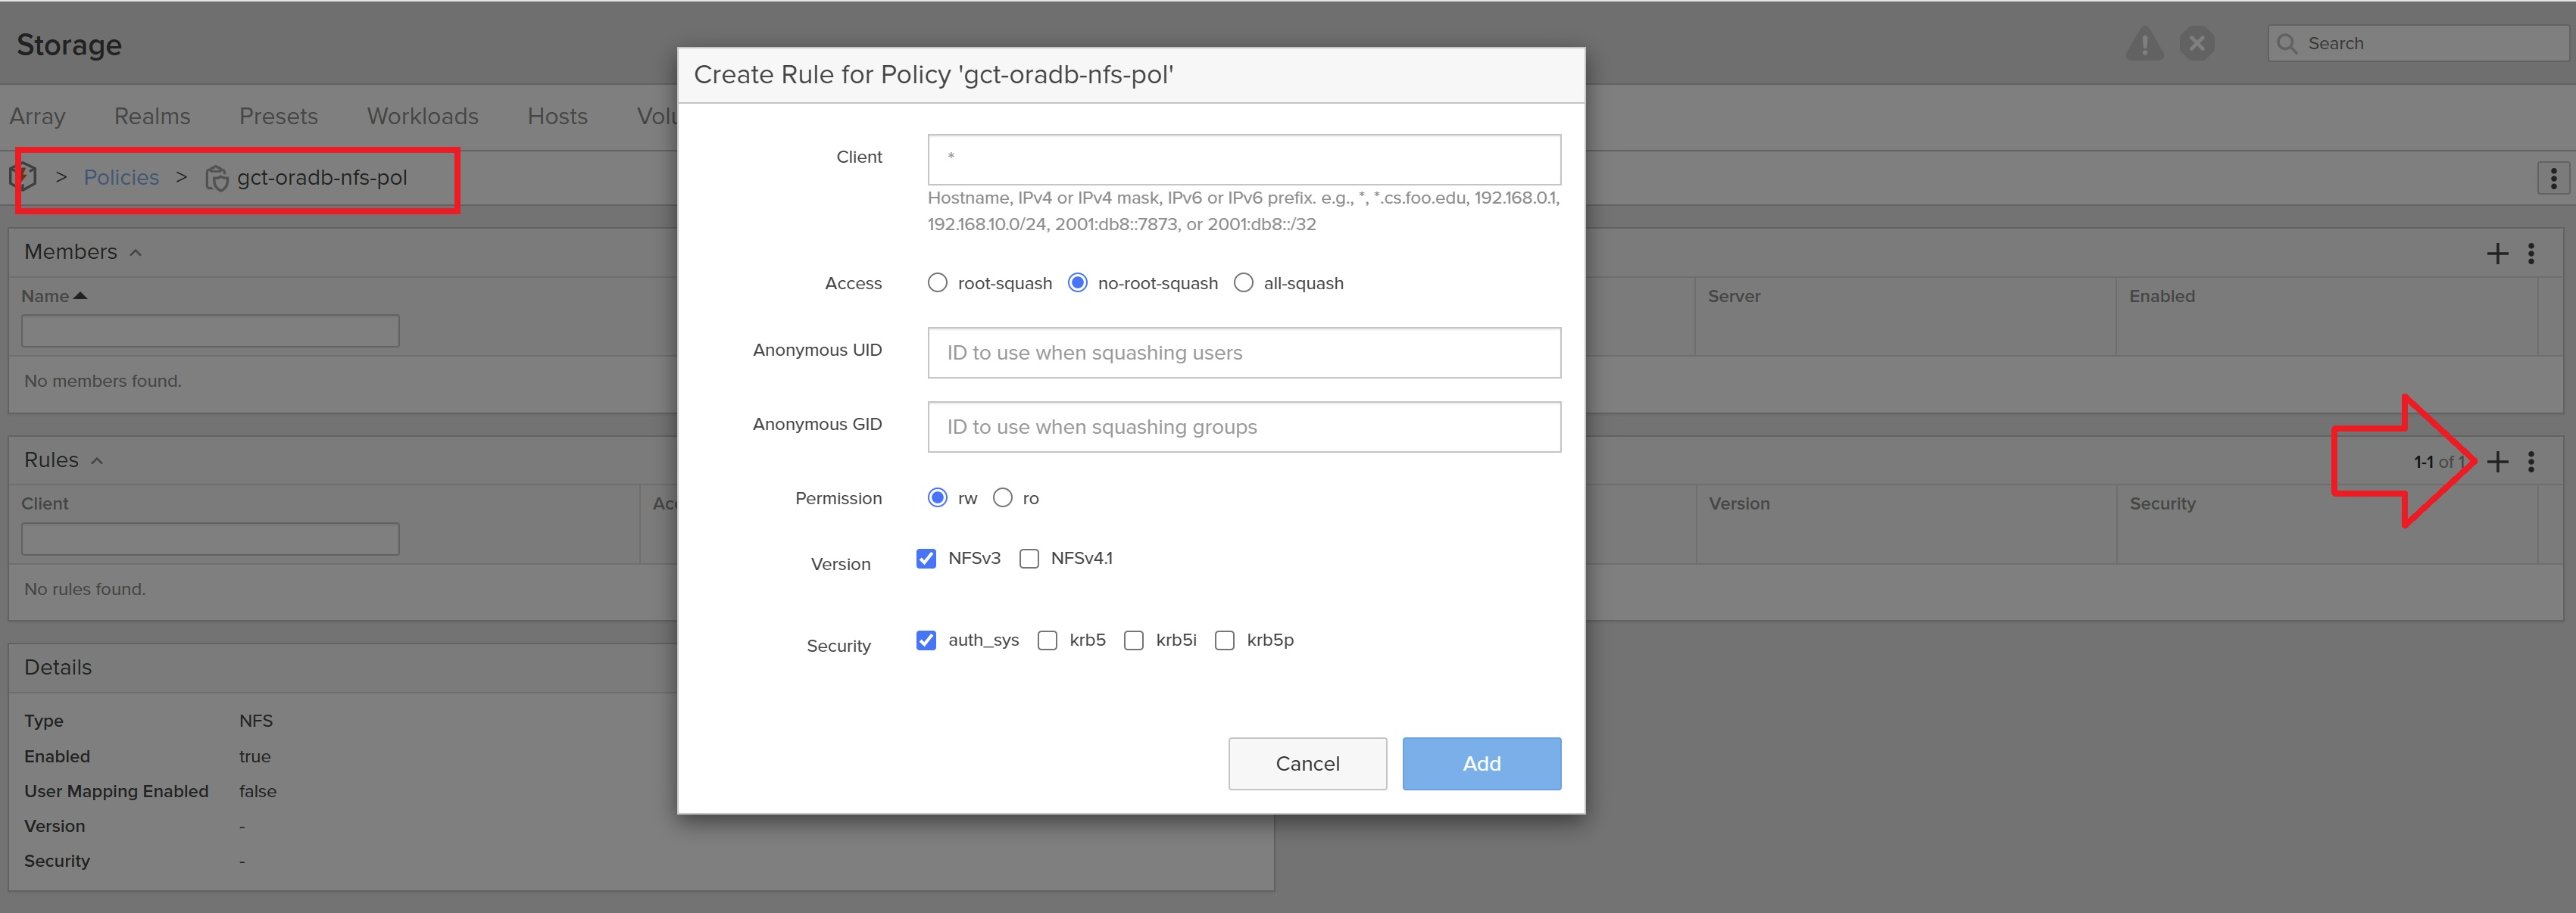
With the new policy created, we can now find it in the list of policies, and edit it. In the Rules panel, select the + button on the right hand side which allows us to add new NFS export rules.
In this example I have set the client to “*”, meaning that any client can connect to this NFS share. For an Oracle database we would typically restrict this to only the hosts allowed to access the database. In this example we have also specified typical NFS settings such as no-root-squash which means Purity will trust the client’s root account (and hence we would typically NEVER use this with * for the client in a real-world scenario – but this is a lab) and read-write. We have selected NFSv3 as our NFS protocol.
Next we can add a directory to this new policy. On the Members panel, click the + button next to the 3-dots. Then click the Directory box and select from the drop-down, or search for the directory that was shown when we created the file system earlier. It should appear as filesystem-name:root.
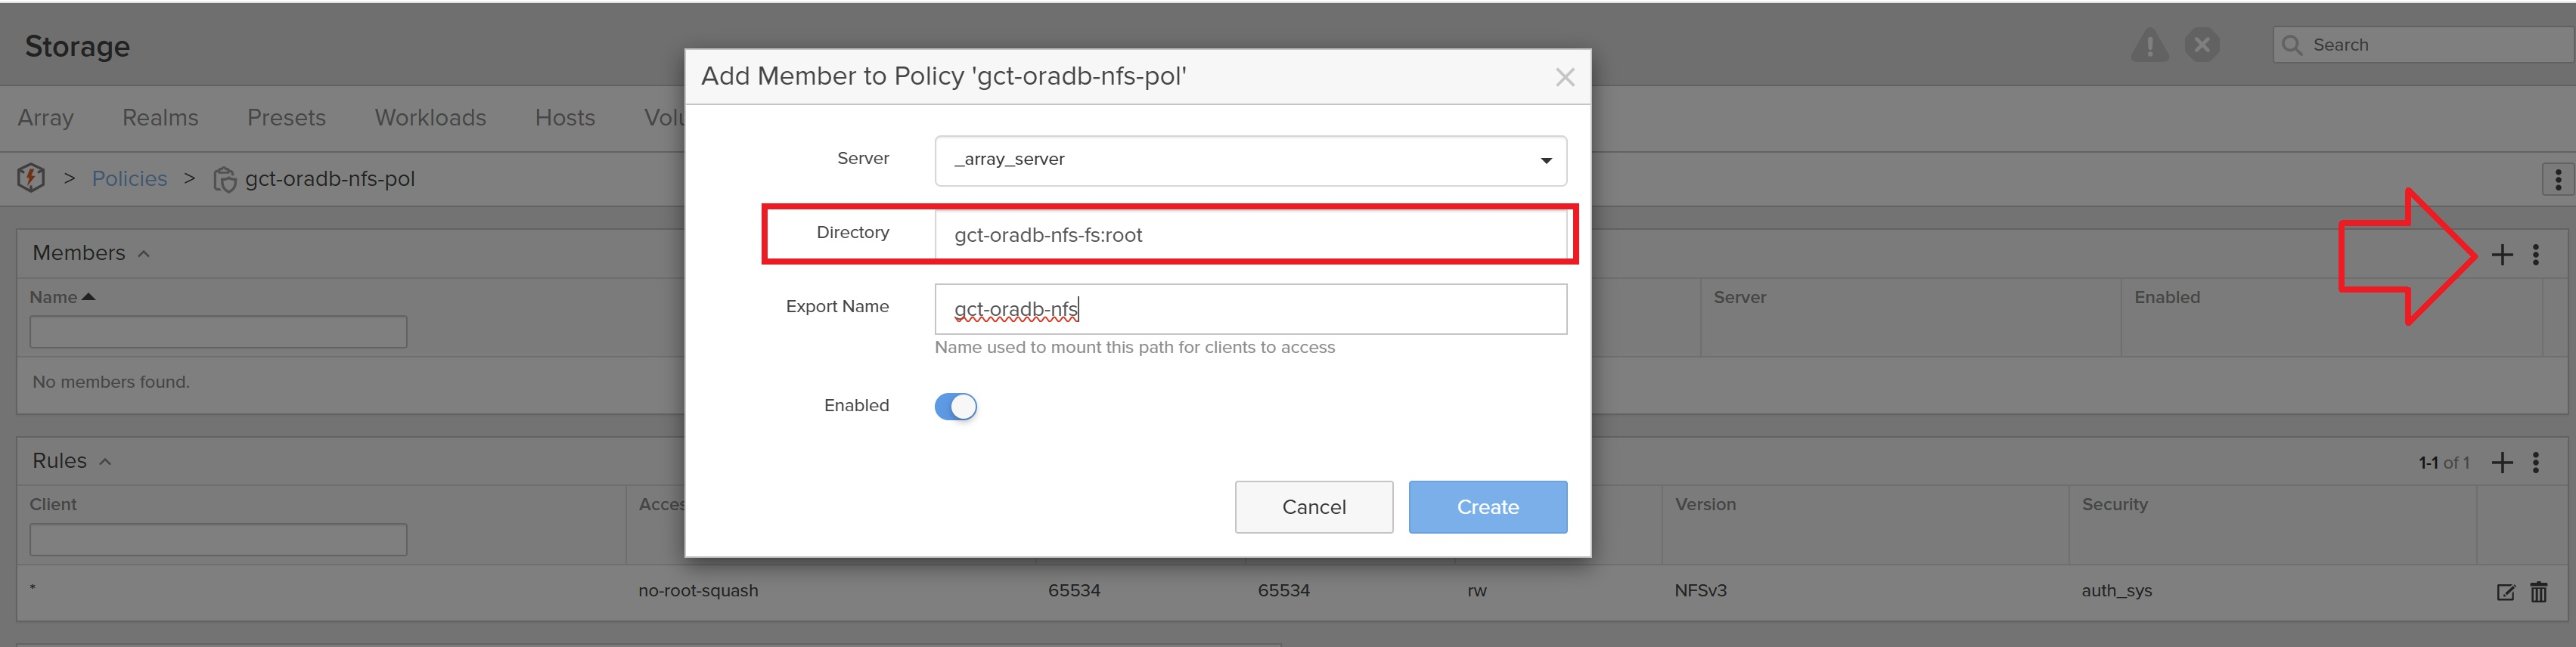
Create an export name for this NFS file system. The export name needs to be unique to this Flash Array. Finally slide the Enabled slider to ON.
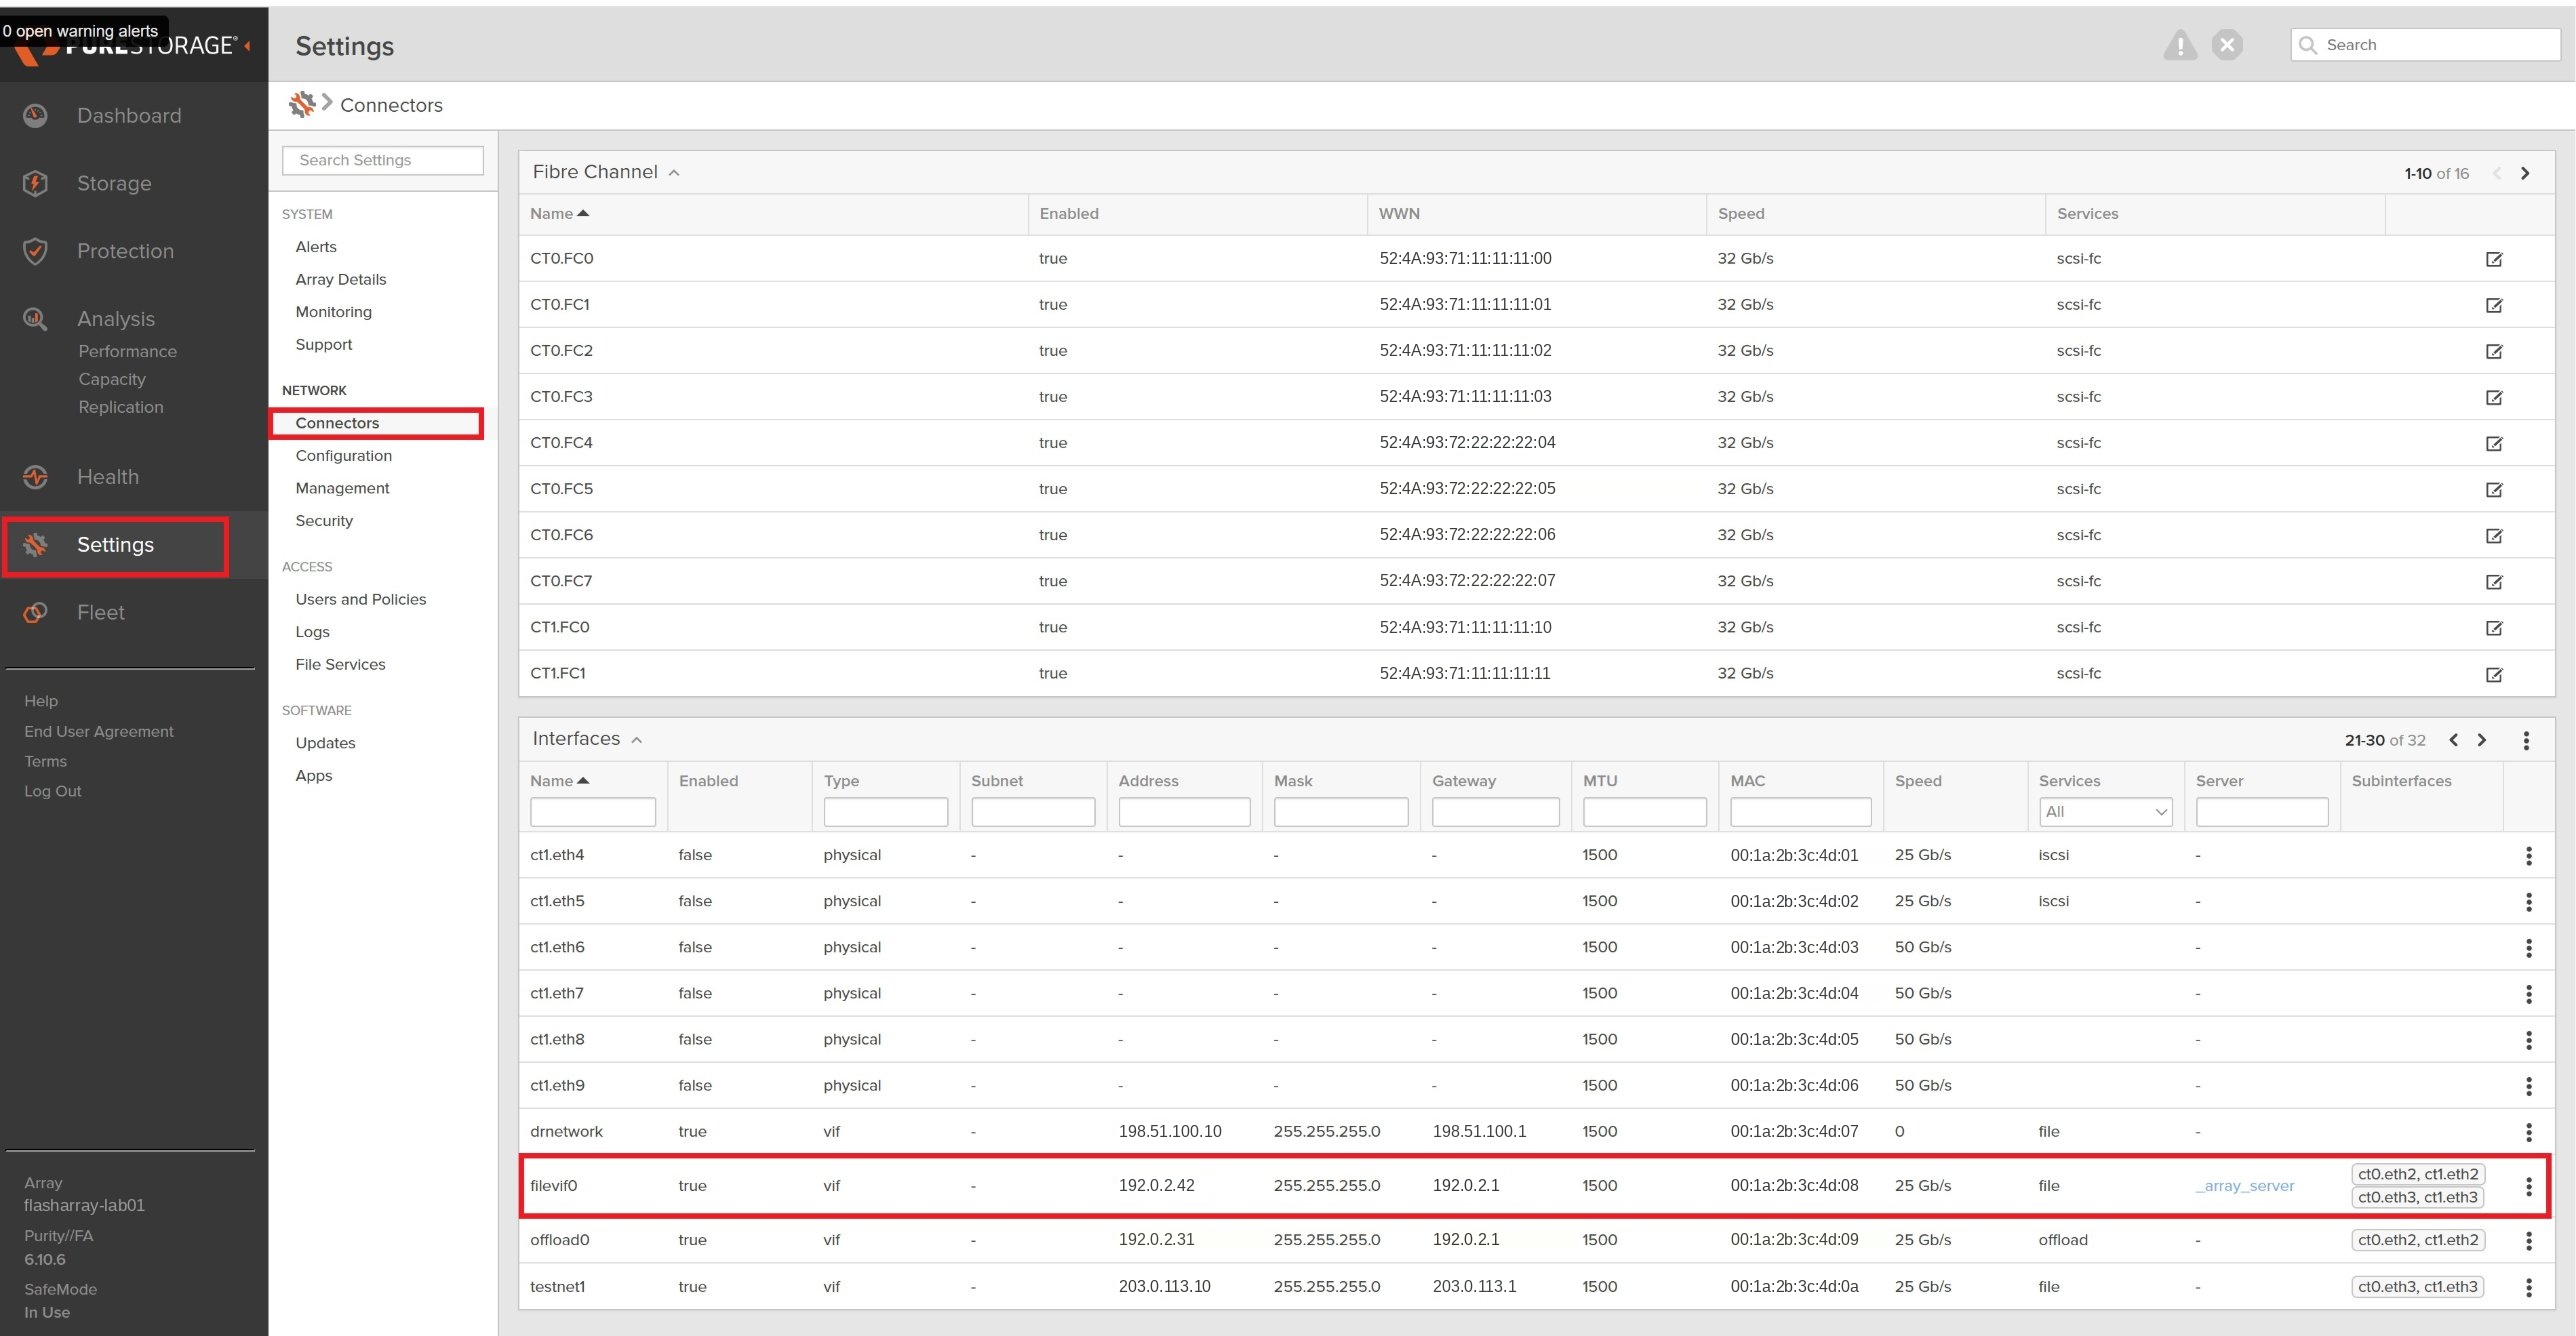
The exported NFS file system will be available on the network interfaces configured for file. To determine which these are, naviagte to Settings and then Connectors and look for an interface labelled filevif. In our example the IP address associated with this is 192.0.2.42. This is address where we should expect to be able mount the exported file system. In most production environments this would be a DNS alias.
Lastly let’s verify we can access the newly exported NFS file system. From a Linux server with suitable network connectivity, create a new directory to act as a mount point and then mount the NFS export. We should be able to read and write files to this NFS share.
$ mkdir /gct-oradb-nfs
$ mount -t nfs -o rw,bg,hard,rsize=1048576,wsize=1048576,tcp,actimeo=0,sec=sys,timeo=600 192.0.2.42:/gct-oradb-nfs /gct-oradb-nfs

