
The Everpure Flash Array provides native support for NFS and SMB, with Everpure stating that both block and file are “co-equal” first-class citizens, meaning that NFS and SMB are baked into Purity//FA and not an add-on. An NFS exported file system on Flash Array benefits from all the features and functionality of the platform, including the ability to make instance and very space efficient snapshots.
However, unlike block volume snapshots which may be instantly copied to new volumes providing for a nearly instant method to clone large databases, NFS snapshots work somewhat differently.
In this blog post I am going to show you to move an Everpure NFS exported file system into a Pod, so that it can be quickly cloned into a read/writeable state.
The conventional Purity file-system snapshot is shown below. In the Purity interface under File System, select the file system you want to create the snapshot for and then select the Directory Snapshots panel. The + symbol on the right allows you to create a snapshot of your NFS exported file system.
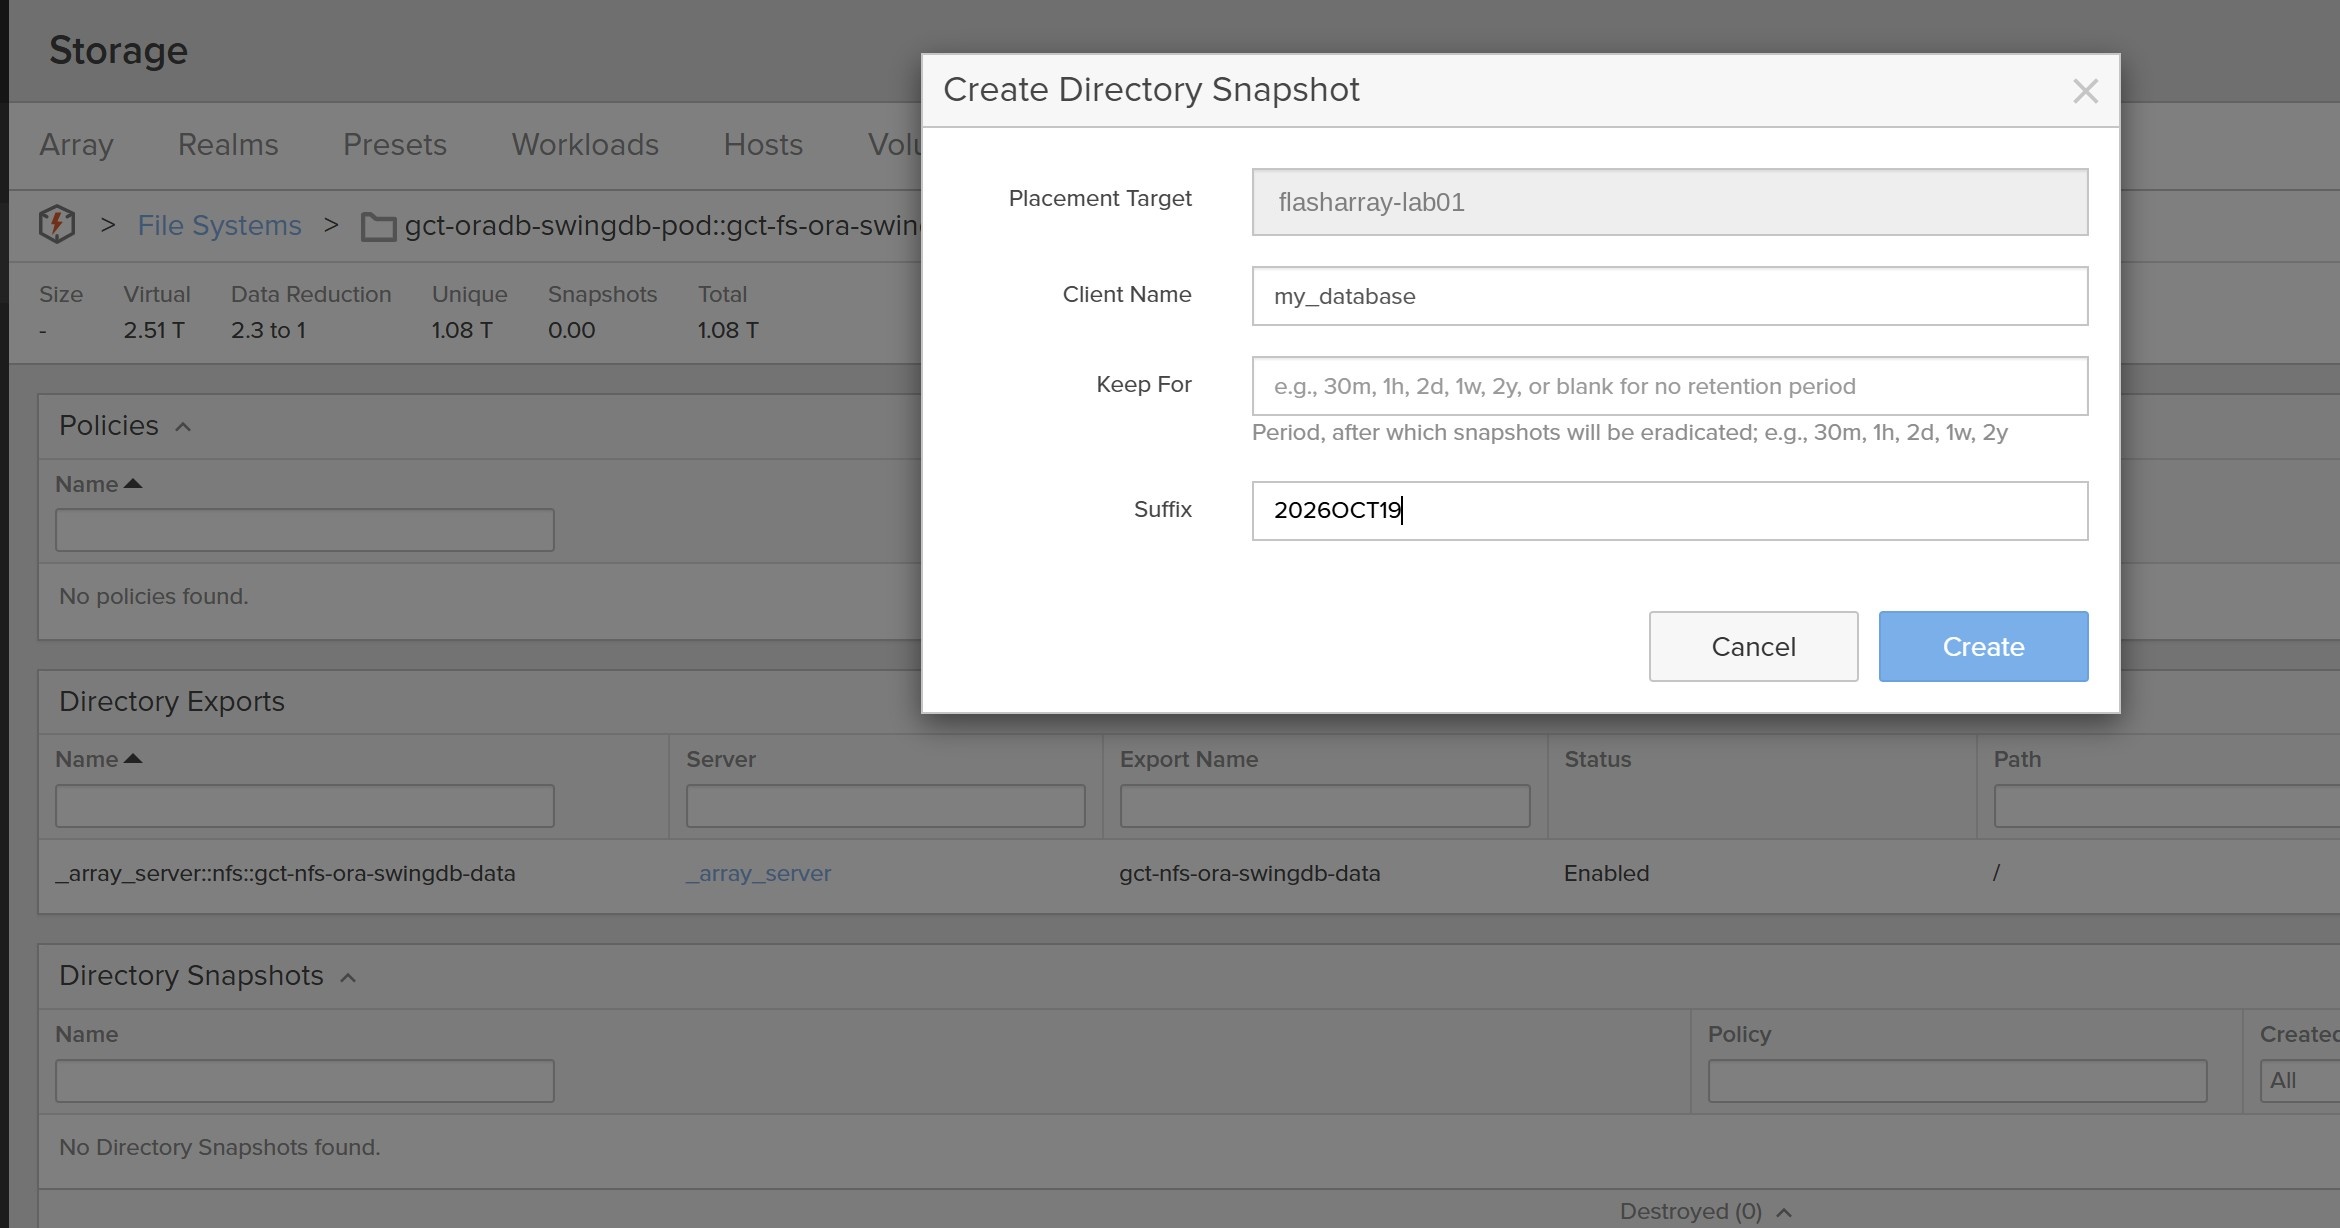
That’s fine as far as it goes. The problem is if you want to them use that snapshot to deliver a space-efficient read-writeable clone of your database. The snapshot is read-only, and is accessed as a hidden directory under the NFS export:
$ ls -al /nfsmnt_swingdb_data
total 3
drwxrwxrwx. 3 oracle oinstall 0 Oct 19 16:28 .
dr-xr-xr-x. 25 root root 4096 Jul 16 09:48 ..
dr-xr-xr-x. 3 root root 0 Oct 19 16:28 .snapshot
drwxr-xr-x. 4 oracle oinstall 0 Jan 6 2026 swingdb
$ ls -al /nfsmnt_swingdb_data/.snapshot
total 0
dr-xr-xr-x. 3 root root 0 Oct 19 16:28 .
drwxrwxrwx. 3 oracle oinstall 0 Oct 19 16:28 ..
drwxrwxrwx. 1 oracle oinstall 0 Oct 19 16:28 my_database.2026OCT19
To be able to use this snapshot to deliver an open database for example, the DBA would have to copy every file from this hidden directory to a read-writeable directory. Fine if the database is small, but cumbersome for a database of any size.
To deliver a rapid thin-clone, we need to move the NFS exported file system into a Pod. We can then use Purity to clone the Pod, which will in turn clone all of the file systems contained therein.
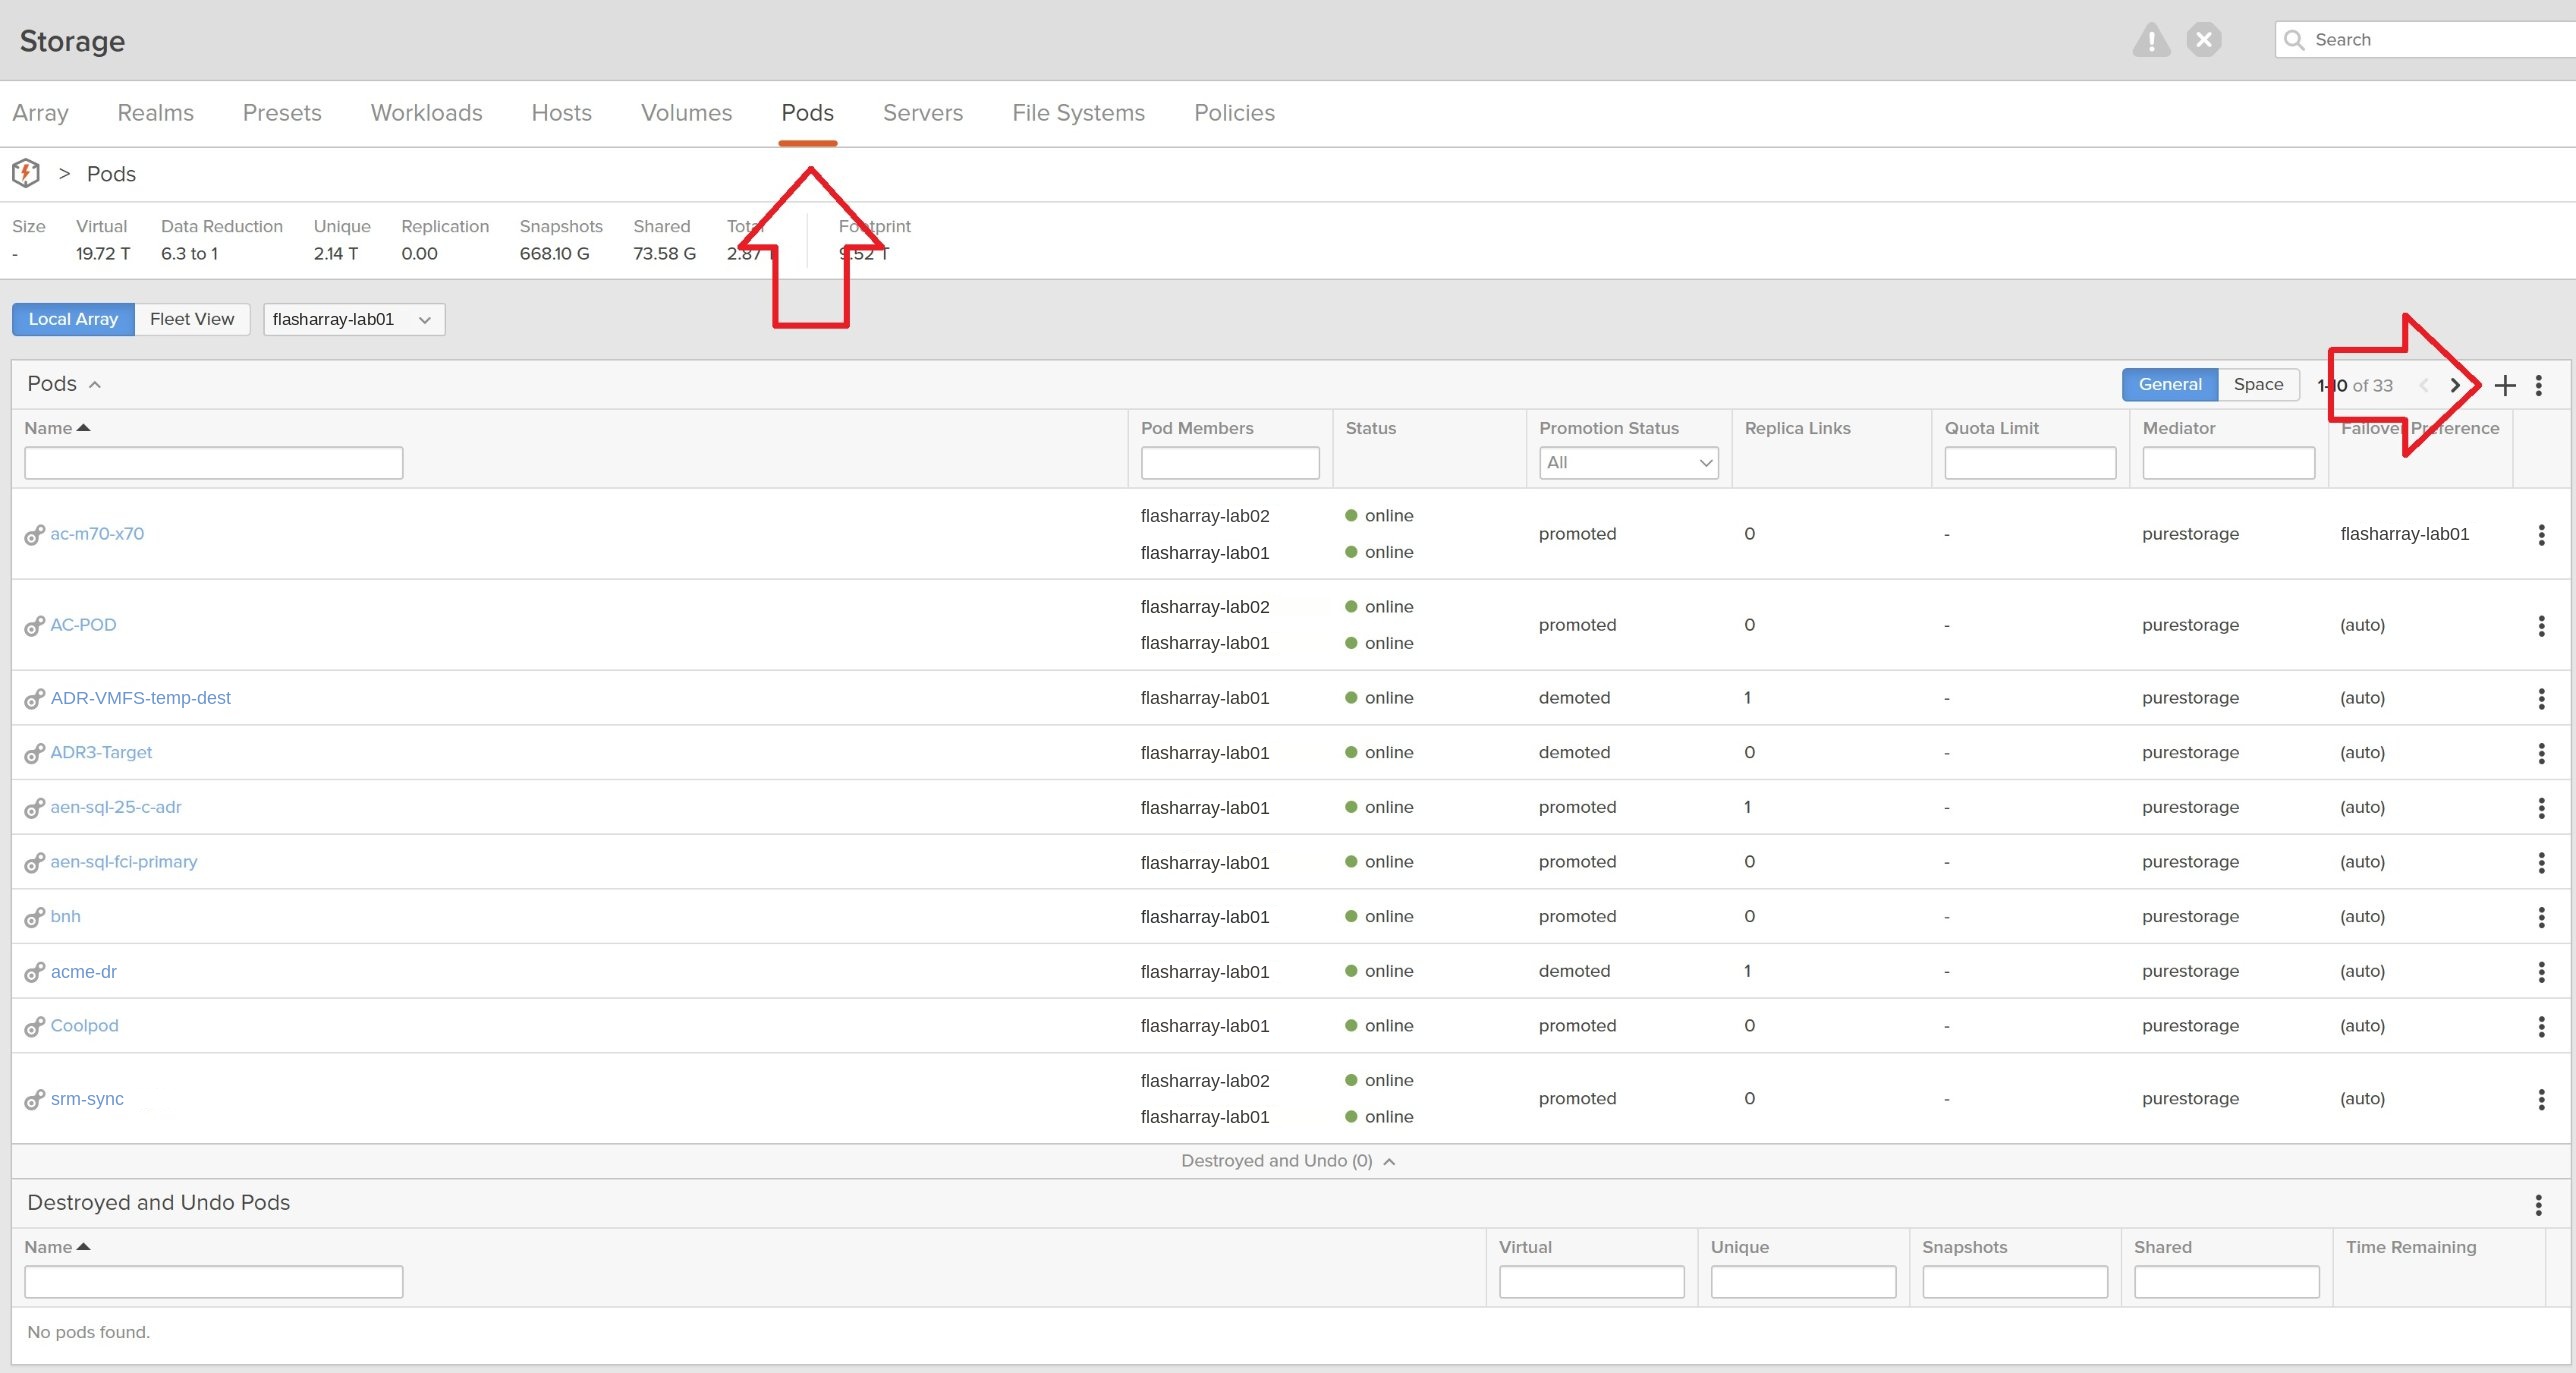
To create a new Pod, navigate to the Pods tab on the Purity interface and use the + button on the right of the panel. Give your new Pod a meaningful and unique name, and if you wish, you can also assign a quota. The new pod is then listed in the interface, and you can click on it to edit the contents of the new pod.
Pods can hold block volumes or file systems, but they cannot, at least at the time of writing this, hold both. The Pod attributes screen therefore shows options for both approaches. In an earlier blog post I showed how to create a new NFS exported file system on Purity, and here we are going to move that file system into our new pod.
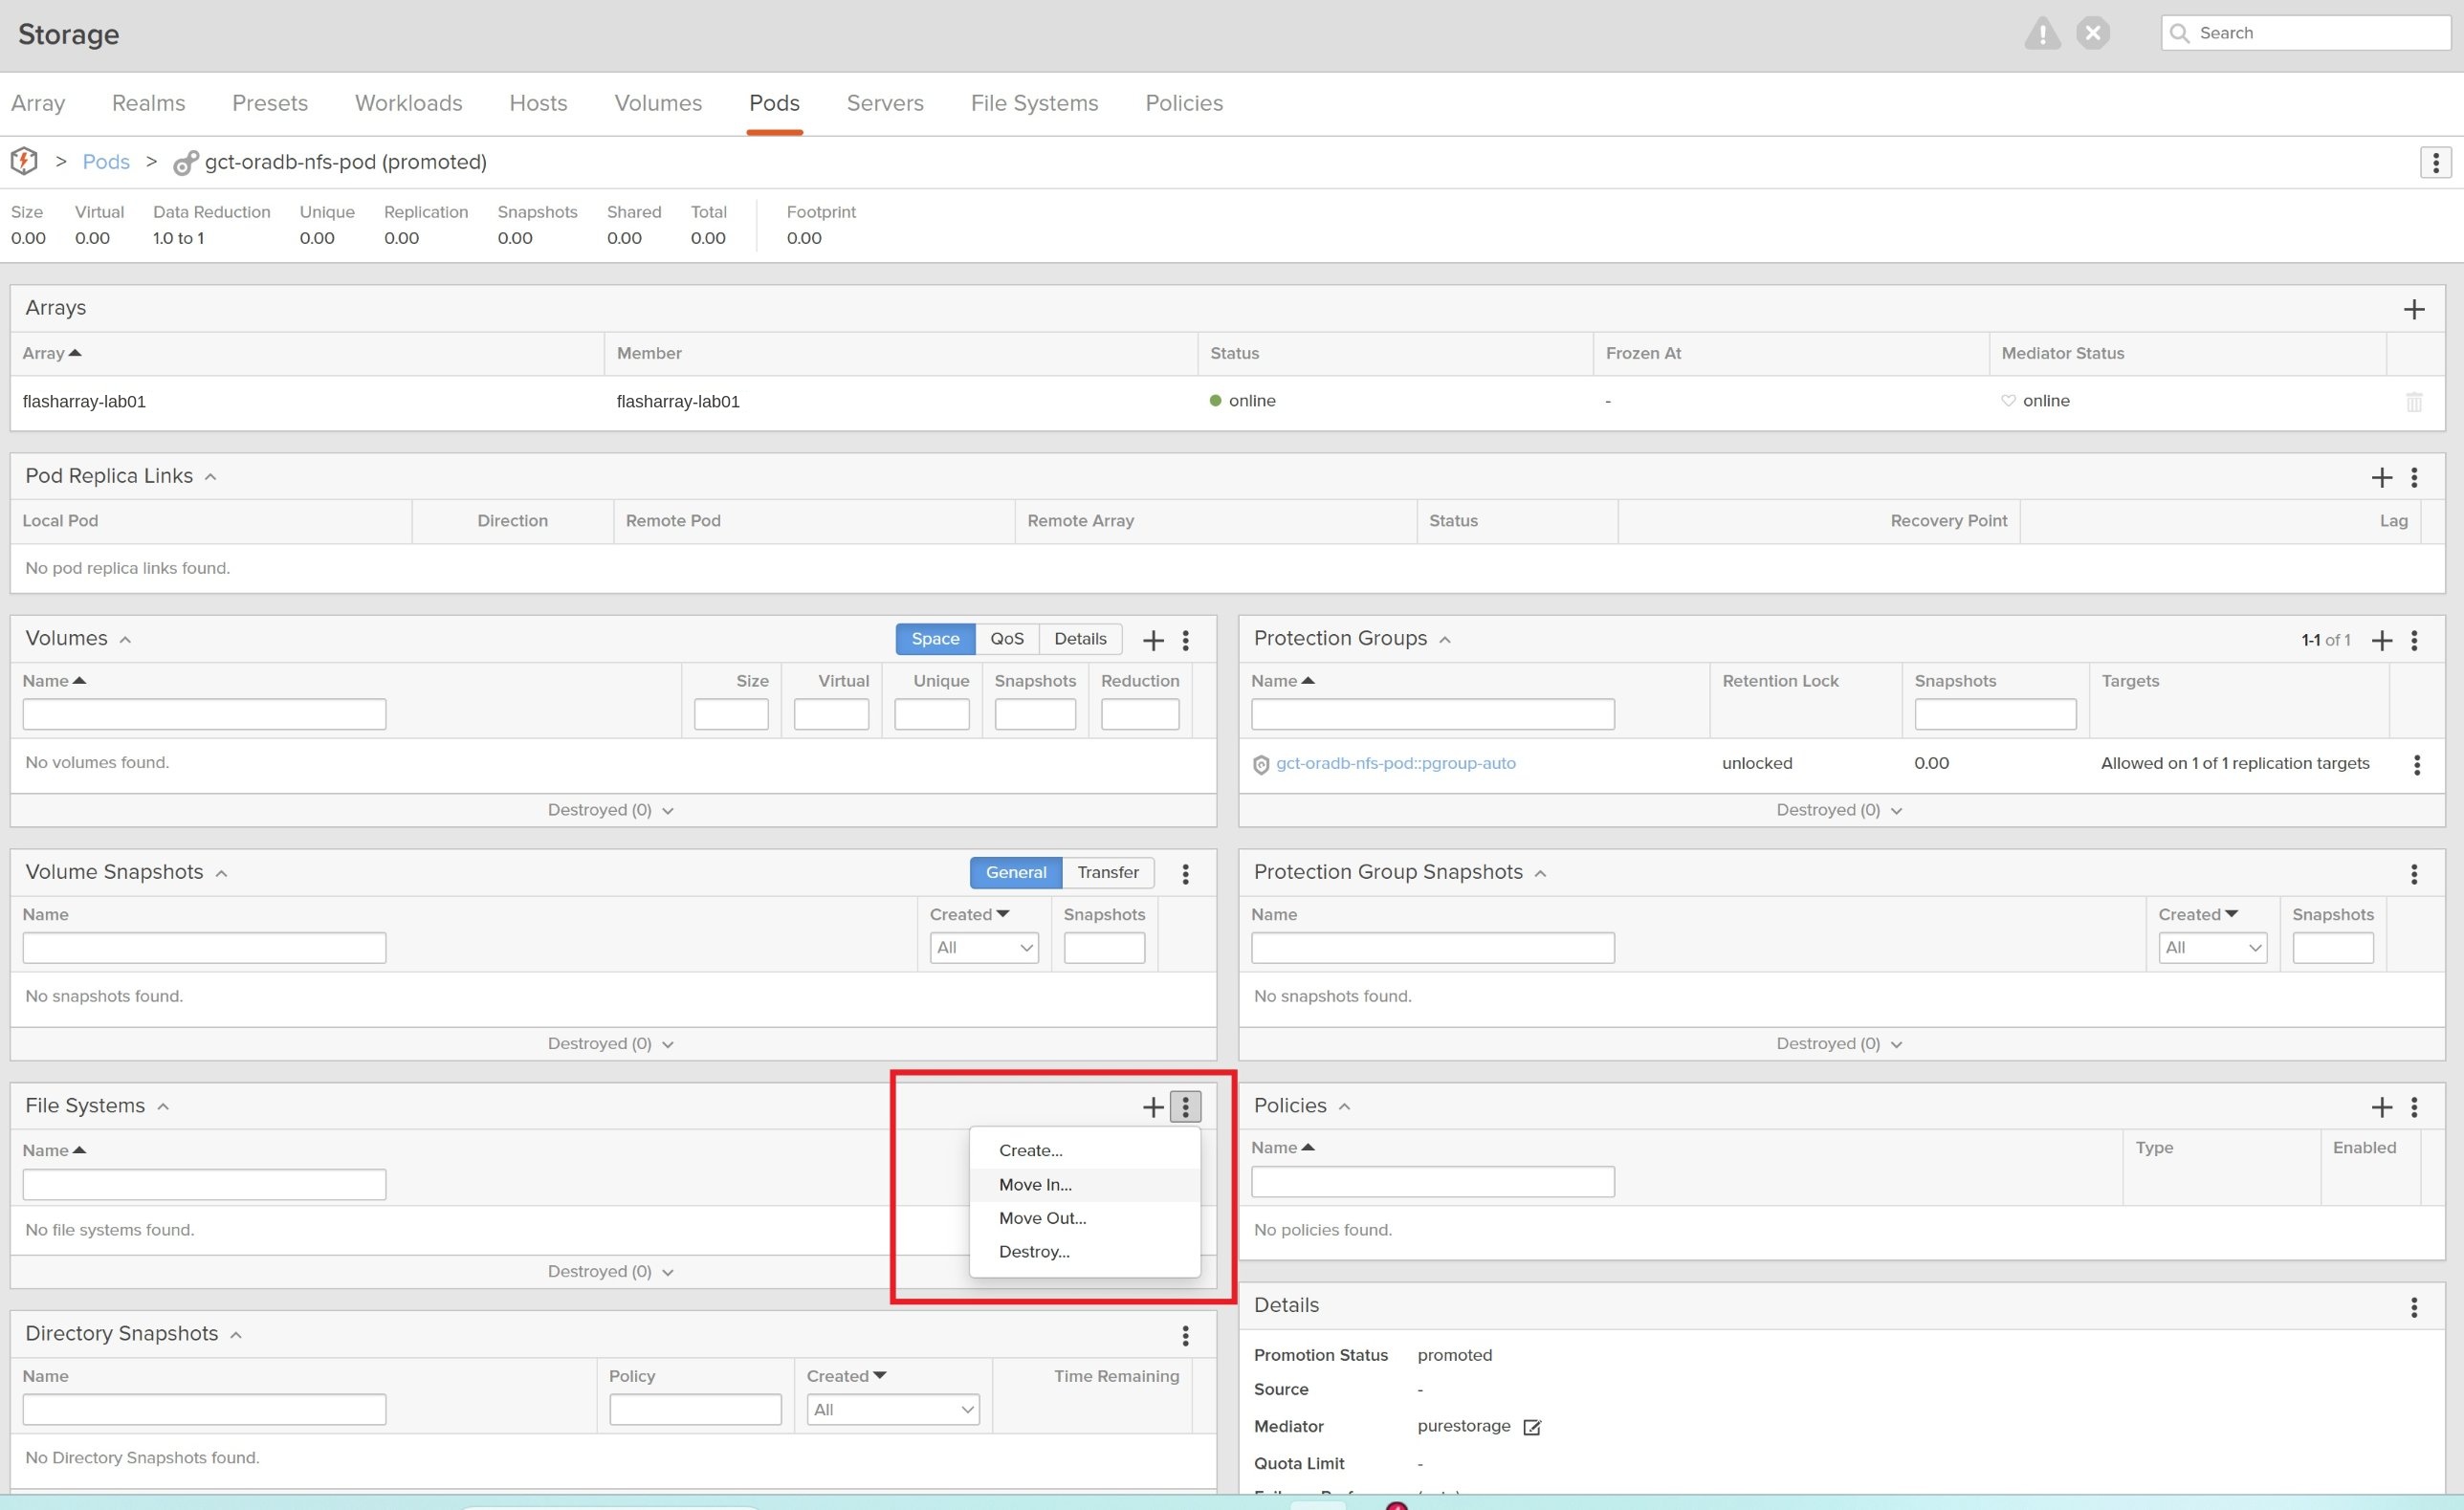
The Pod attributes screen has a panel labelled File Systems. The 3-dots button to the left has a Move In… option and we select that to move an existing file system into our new pod.
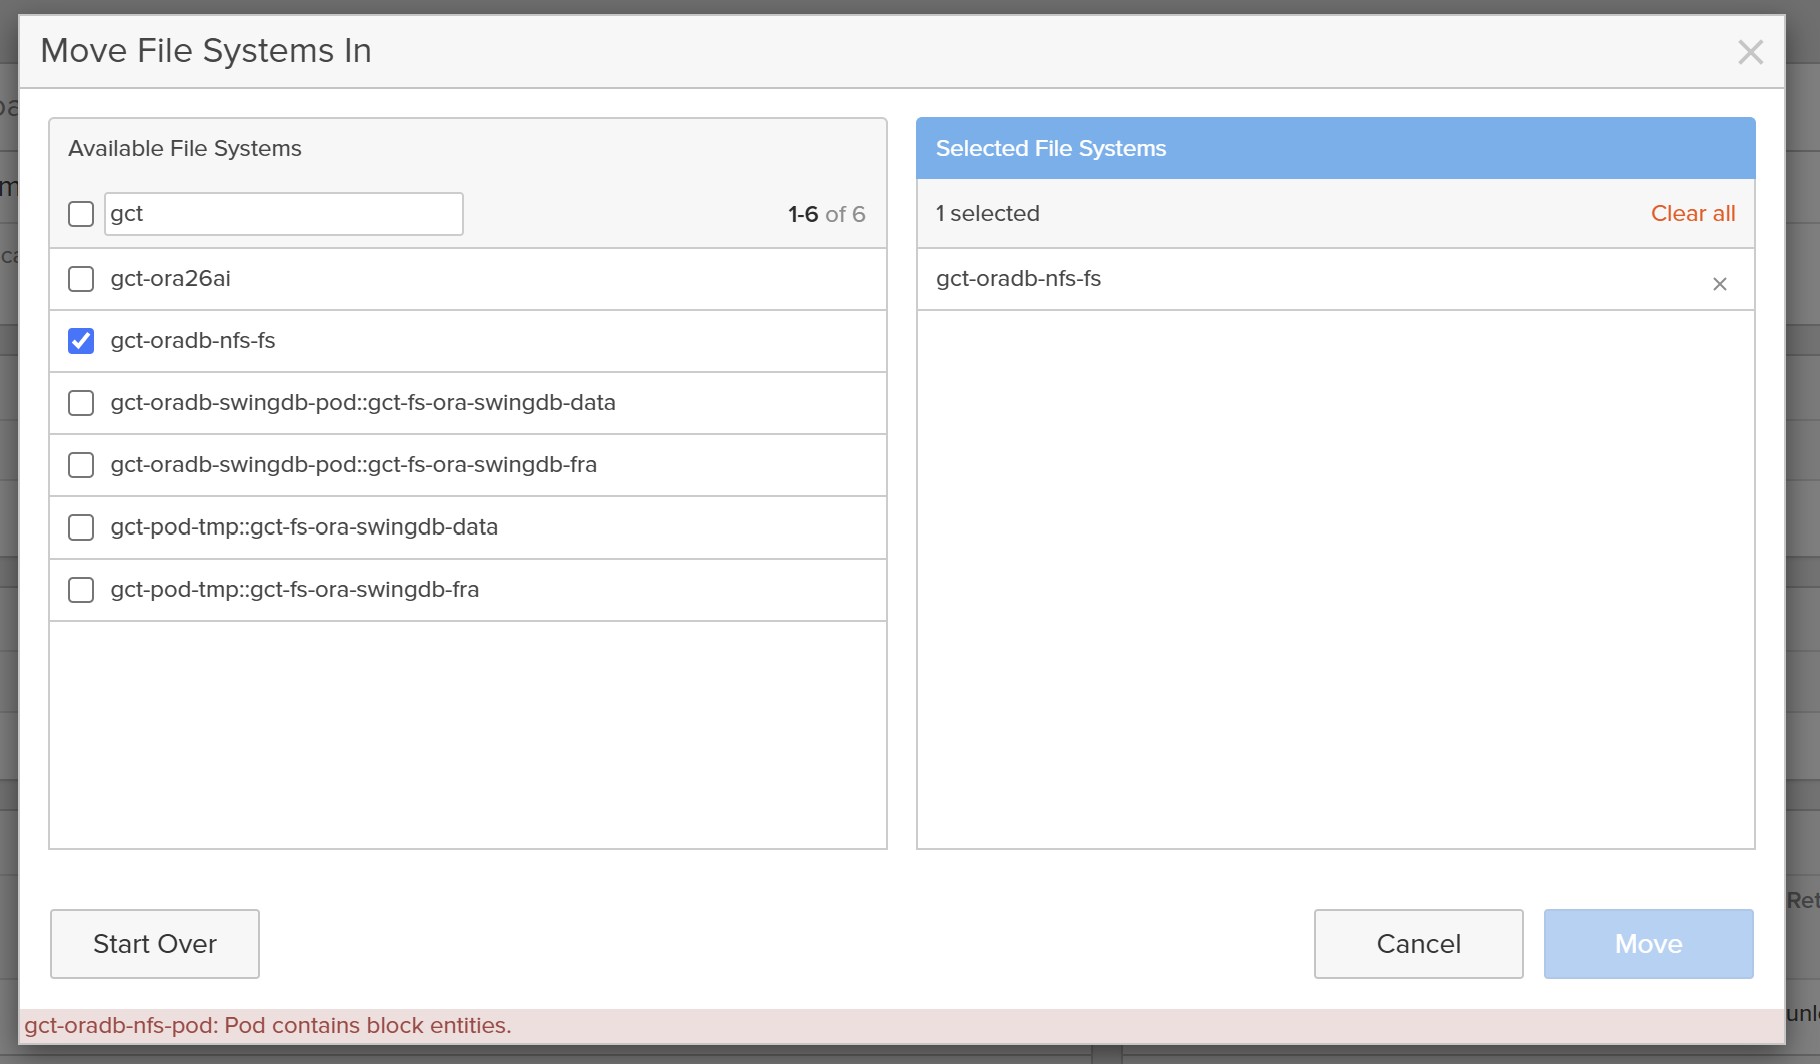
The Move File Systems In dialog allows us to look up and find the file systems that were created for the NFS export. When we select Move however, Purity reports that gct-oradb-nfs-pod: Pod contains block entities. You may not hit this issue depending on how you have Purity set up, but in our example here, the default settings for new pods is to create a protection group and then replicate it to a target.
Returning to the Pod attributes screen you can see we have a default protection group labelled pgroup-auto. This was created automatically when we created the pod.
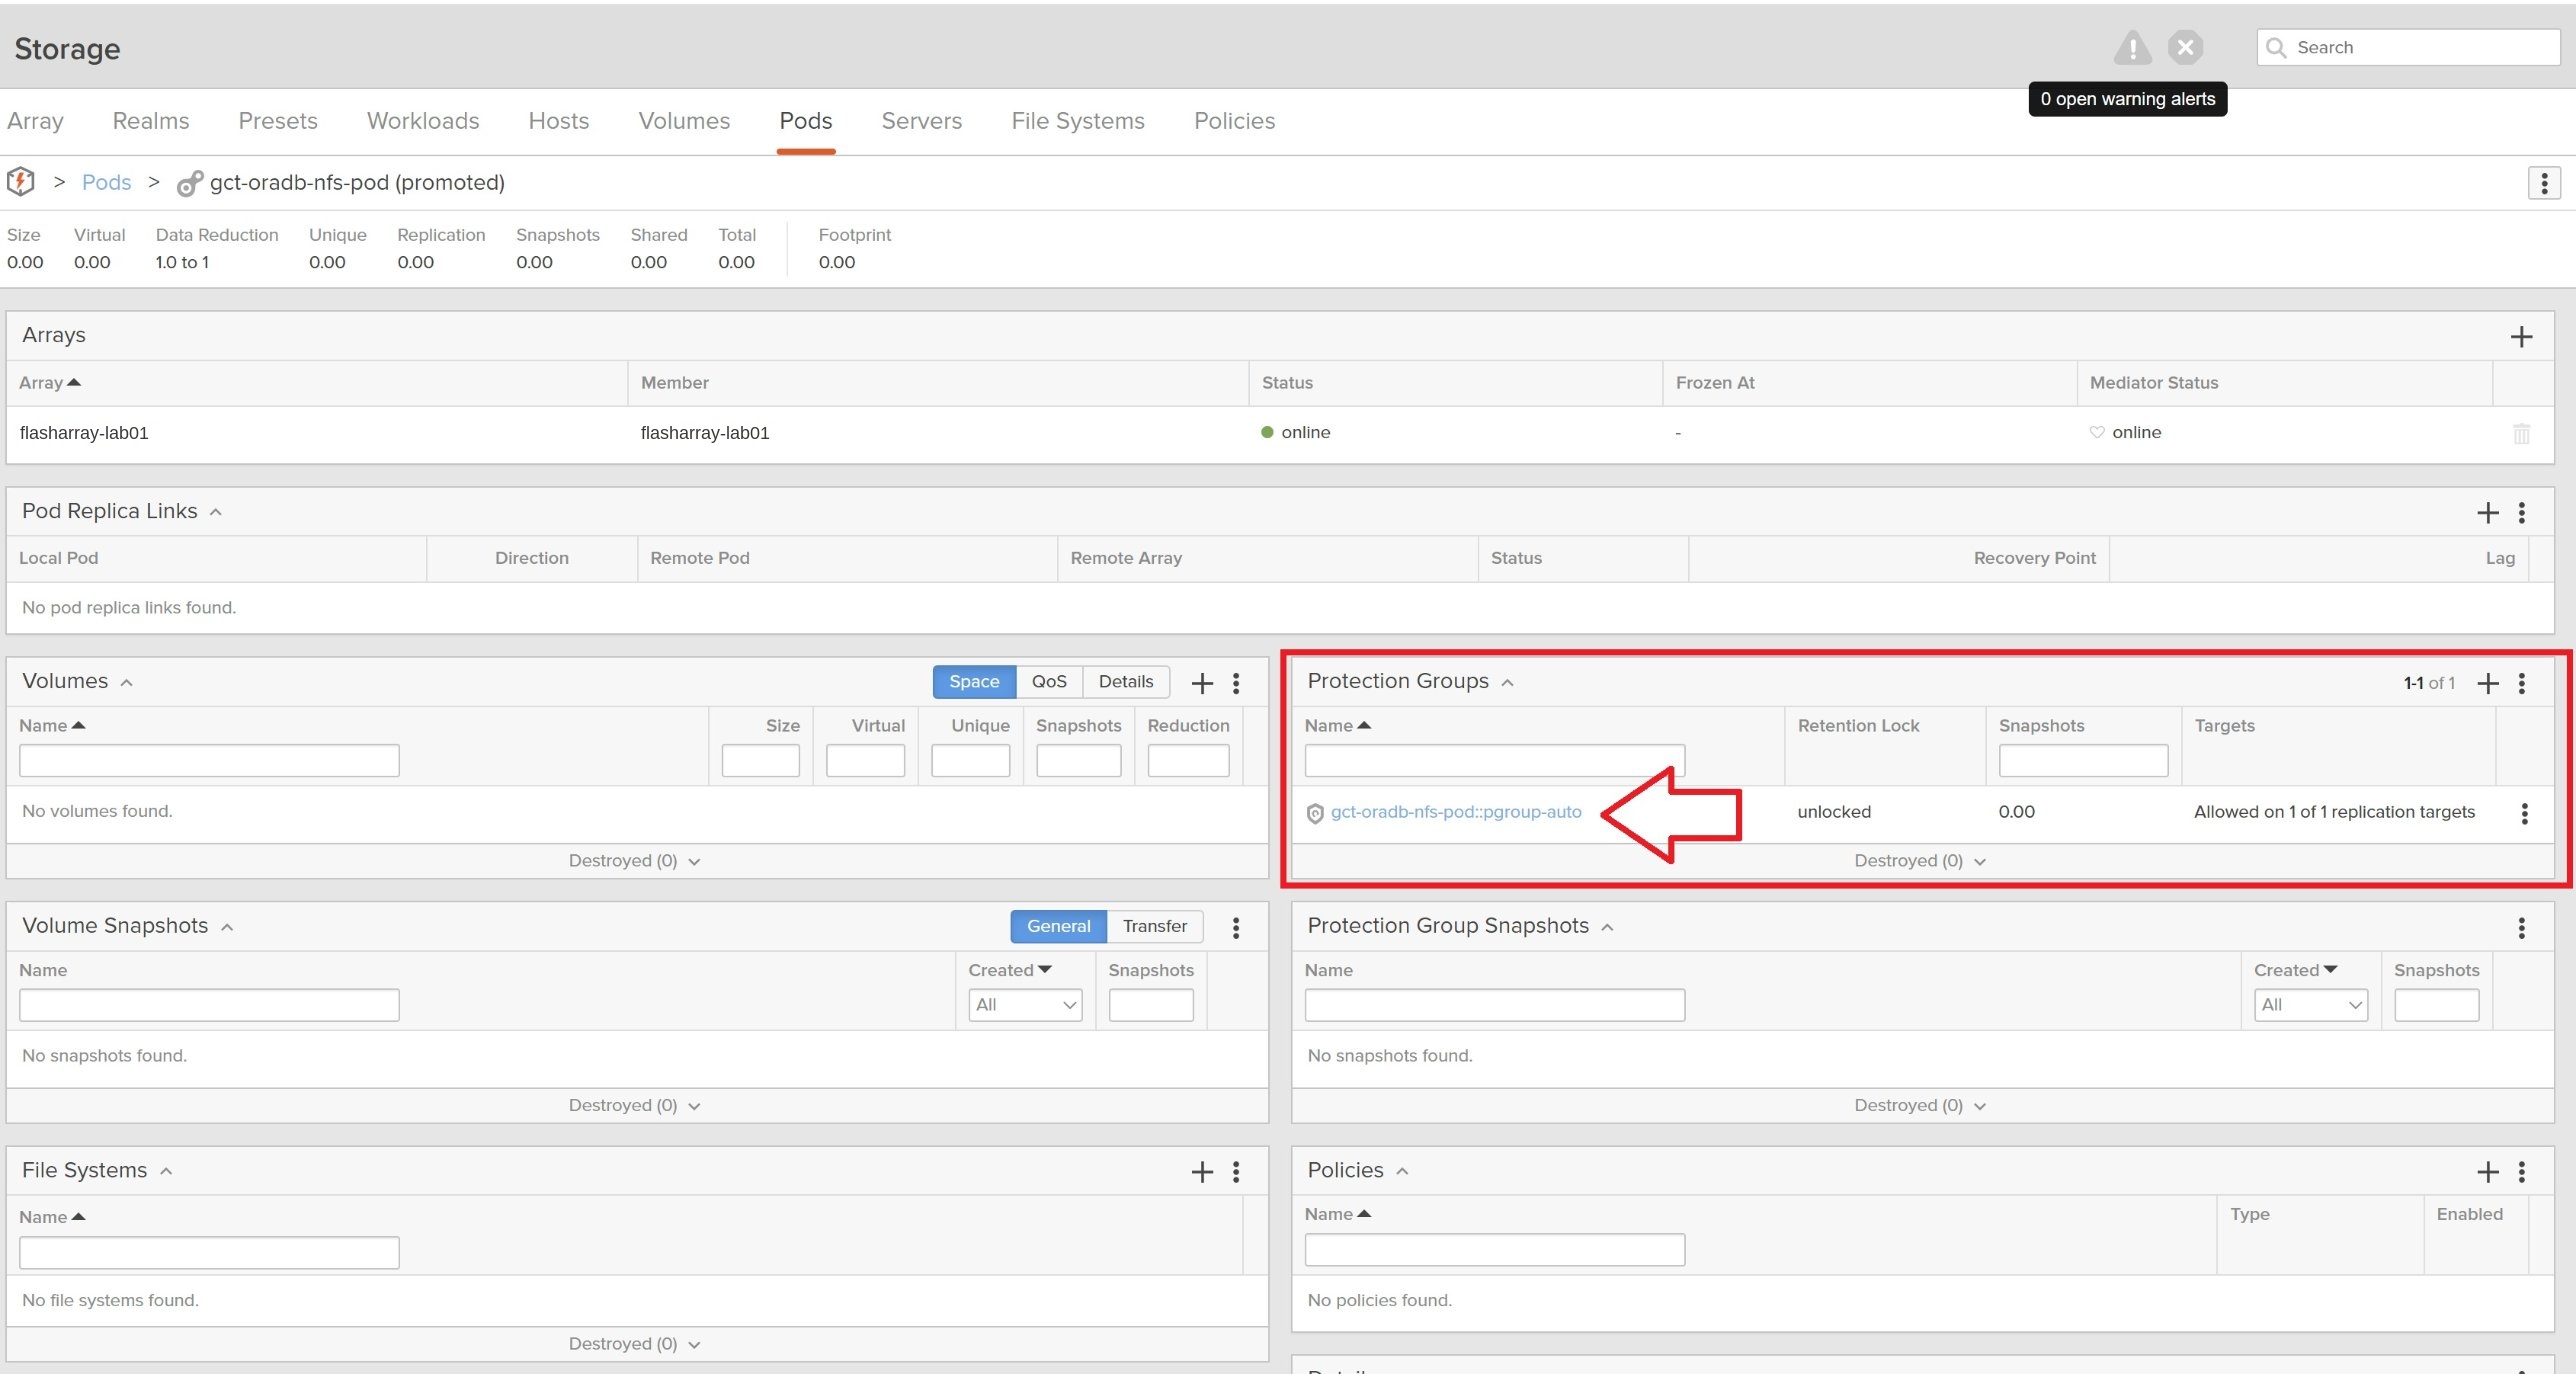
If we click on the protection group, it shows us that it is replicating to a second Flash Array called flasharray-dr1. Purity considers this default protection group replication suitable for block. Therefore it considers the Pod to be a block-based pod and since we cannot currently comingle block and file in a single pod, it will not allow us to add file systems to the pod.
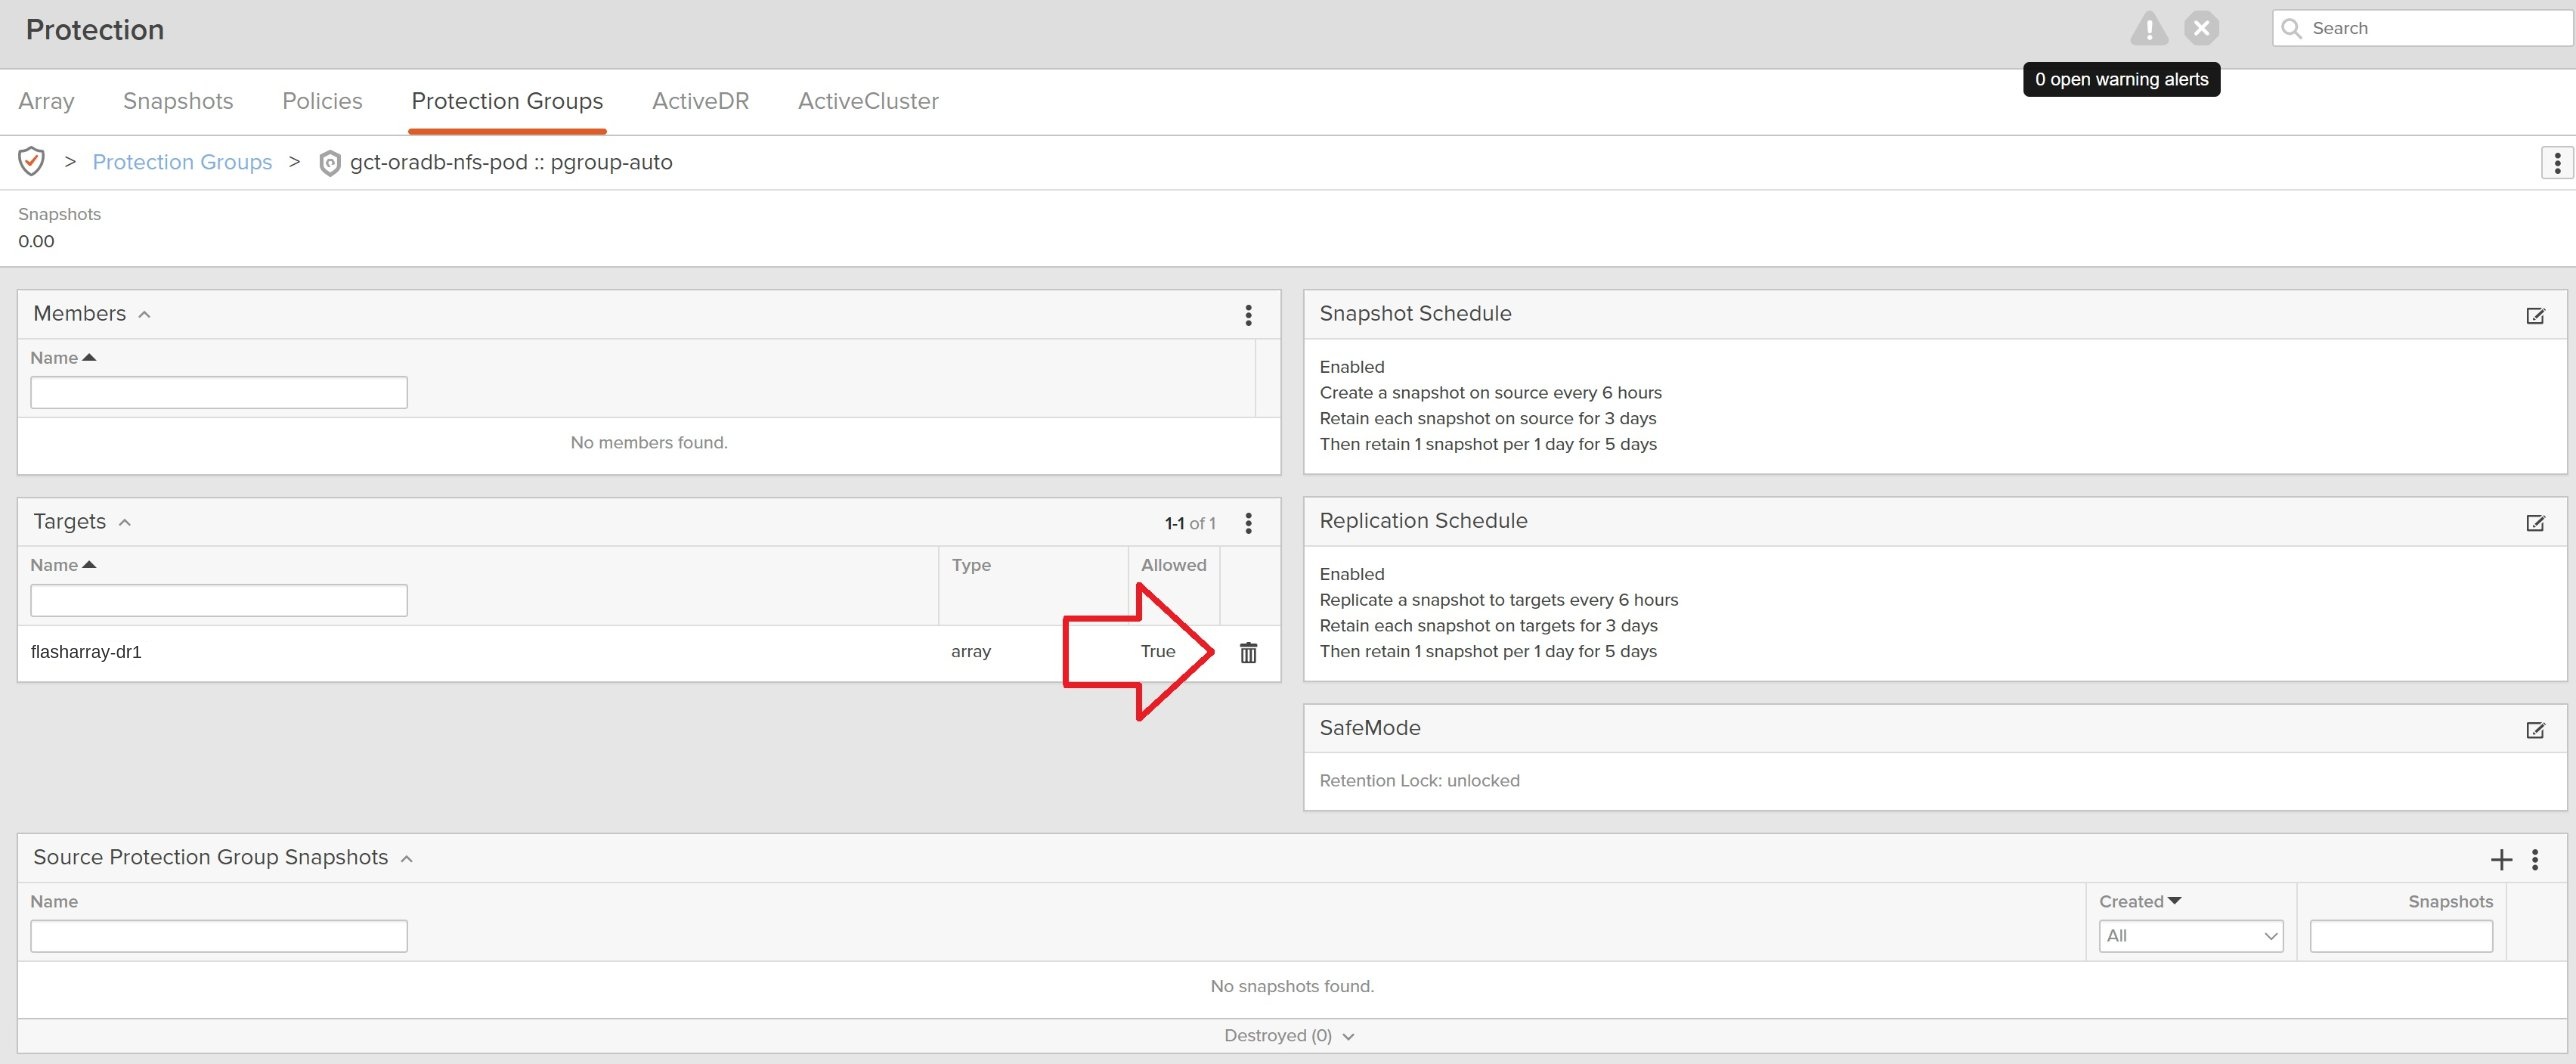
Therefore, we will delete the replication to flasharray-dr1.
Now with the block replication removed, we can again use the Move File Systems In dialog to move our NFS exported file systems into the new pod.
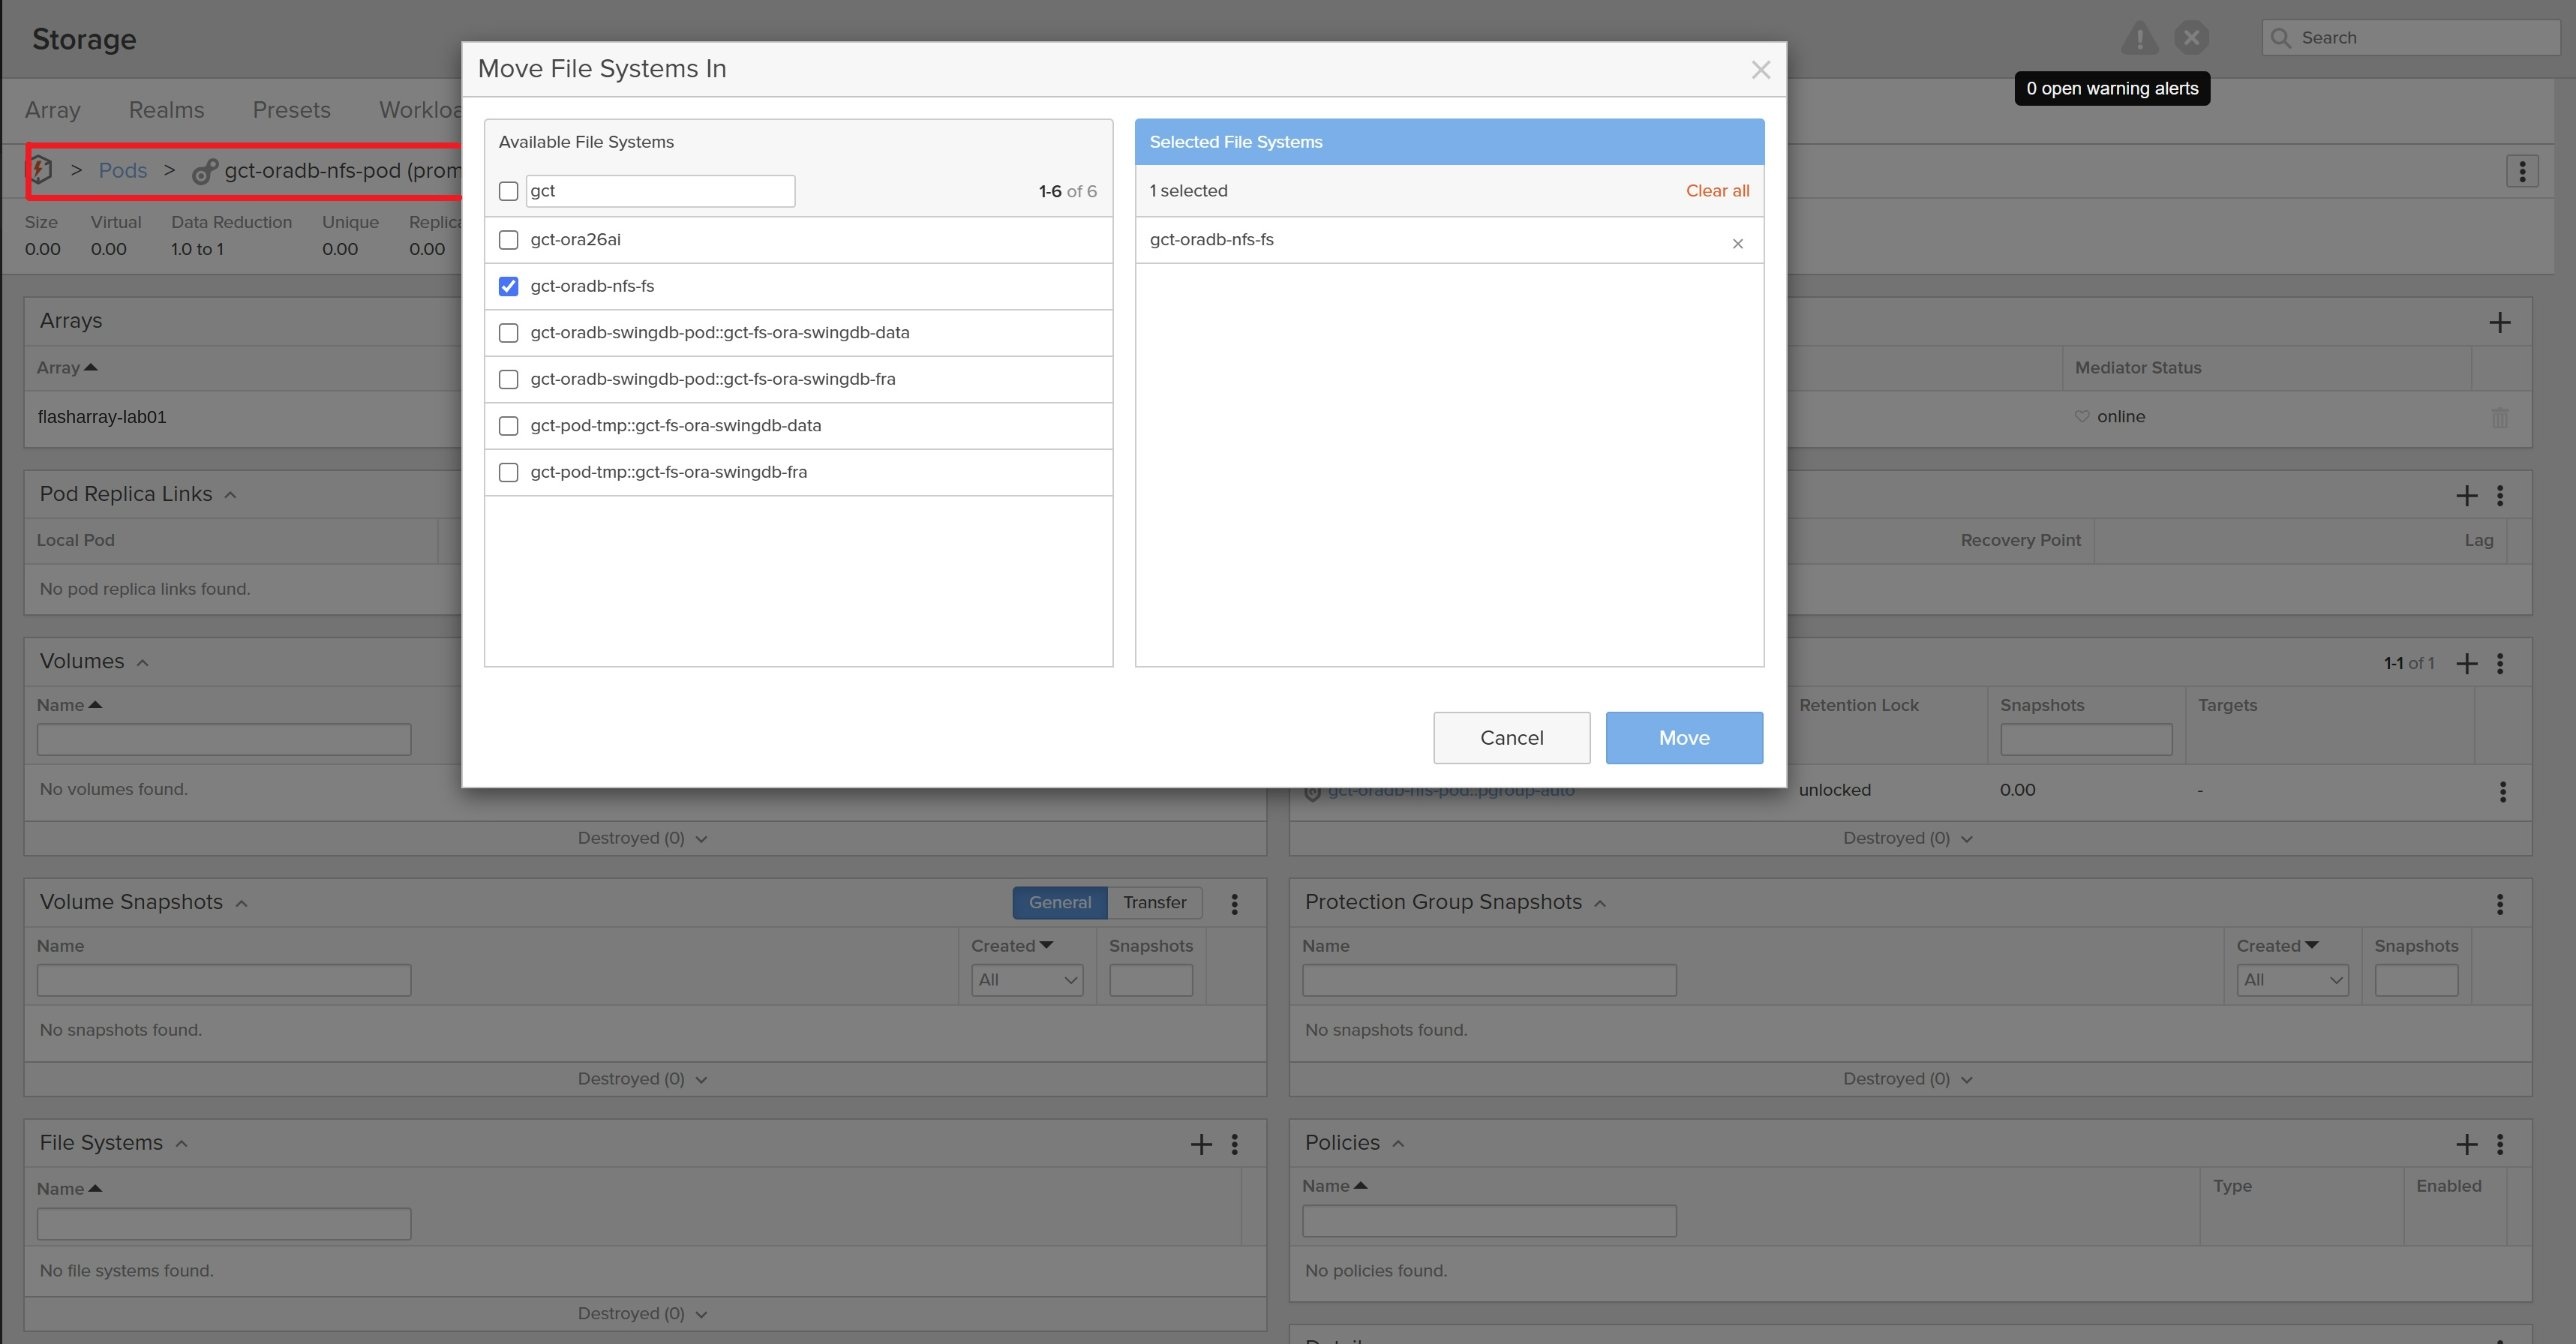
At this point you should have your NFS exported file systems now added to the new Pod.

